Posts
View Dashboard > Posts
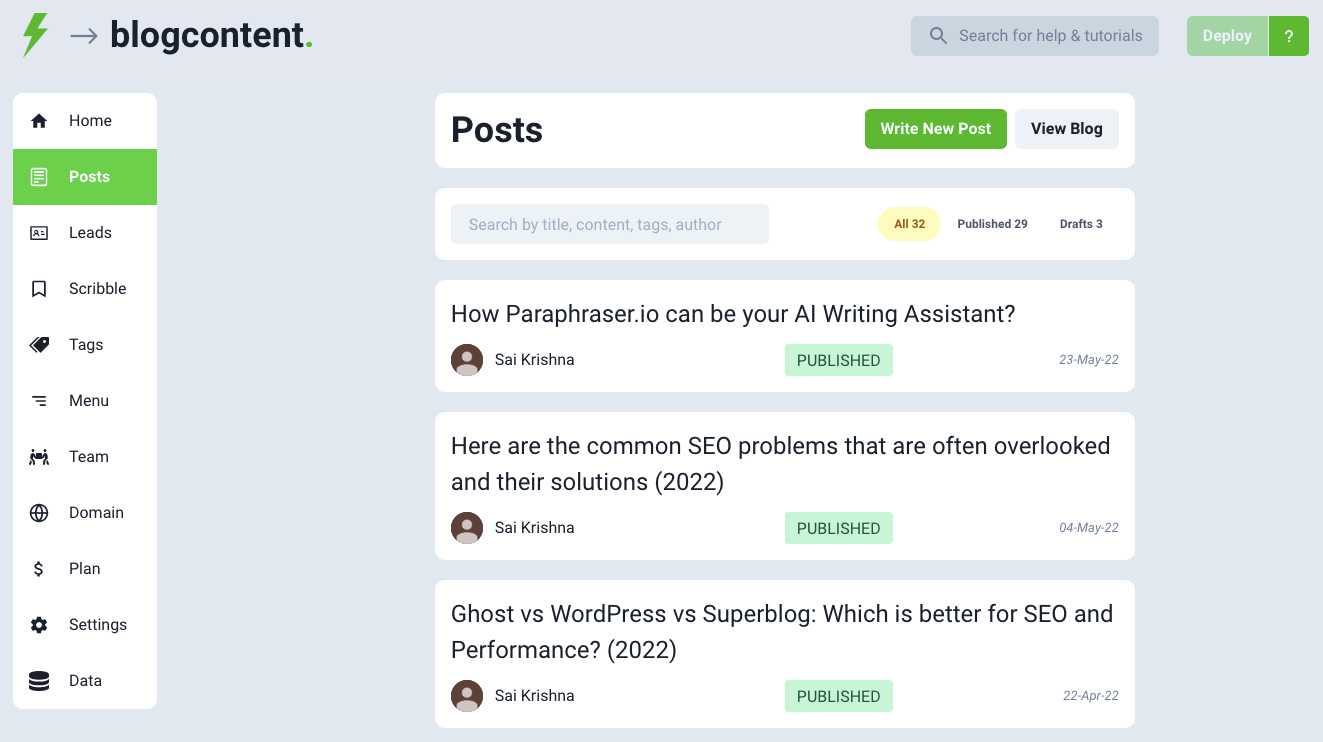
You can write new posts and edit existing posts from here. Click on the "Write New Post" button or any post to go the editor.
Bulk View
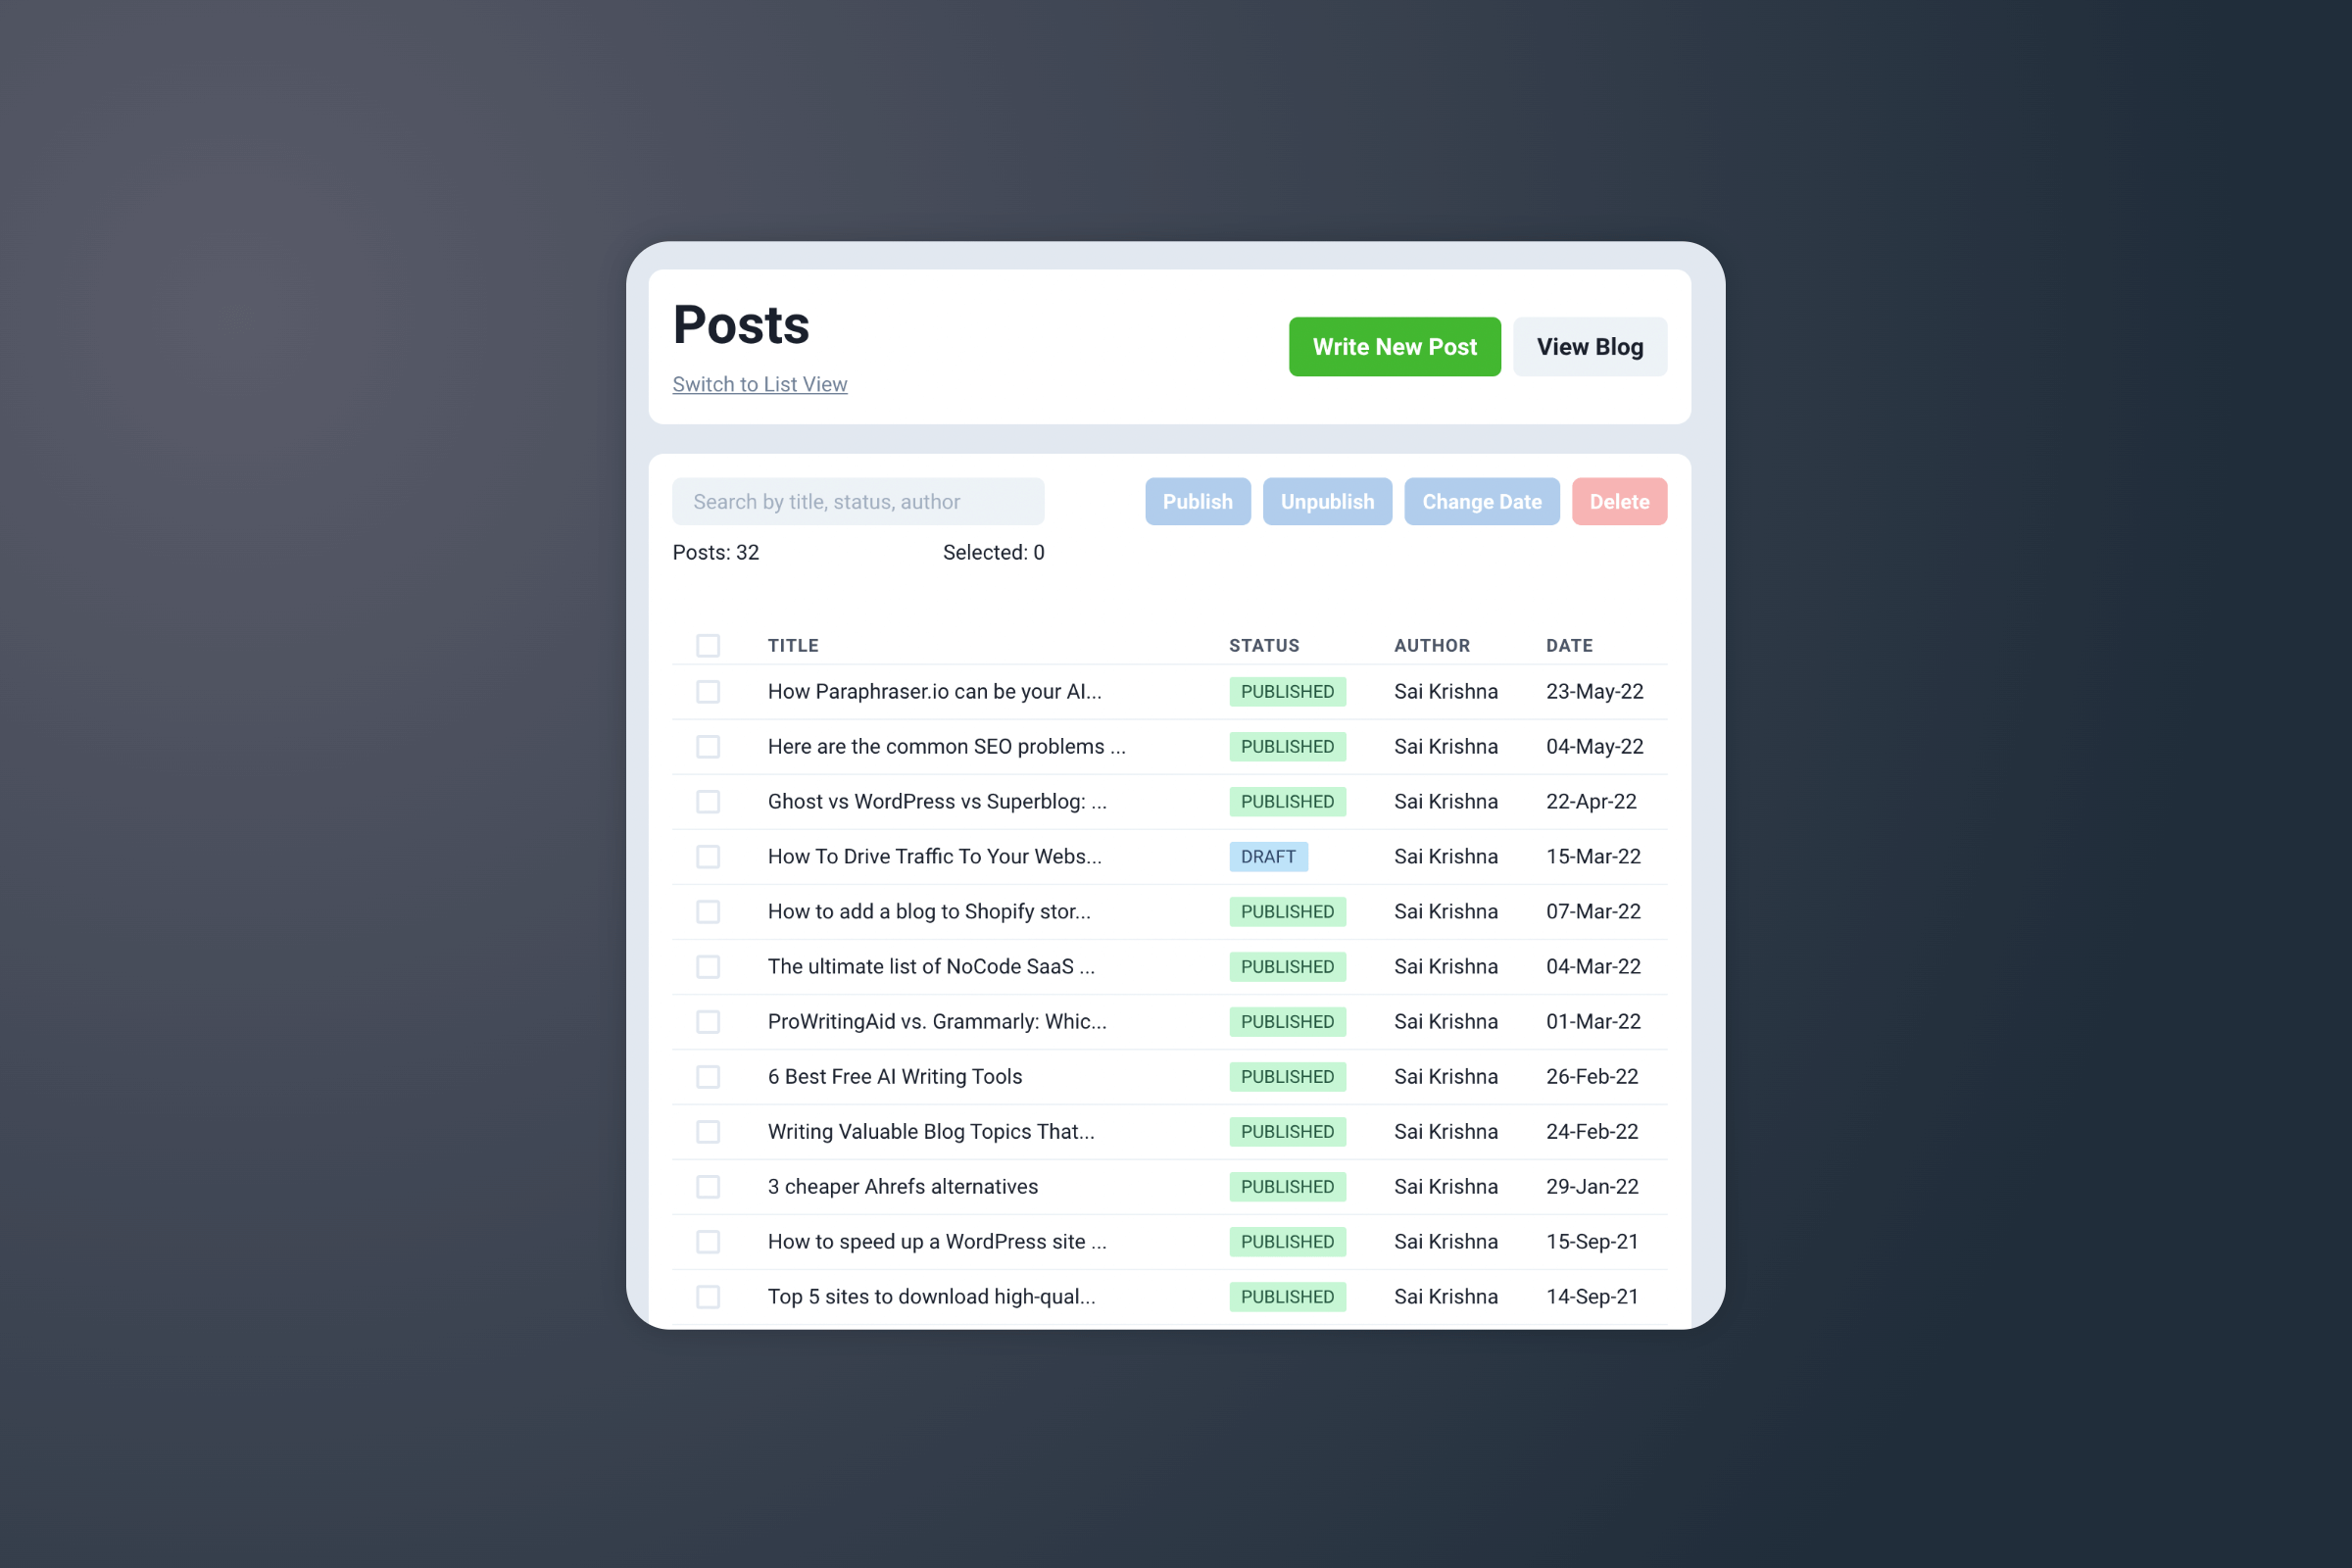
You can browse your posts in a table format via bulk view.
Import Post
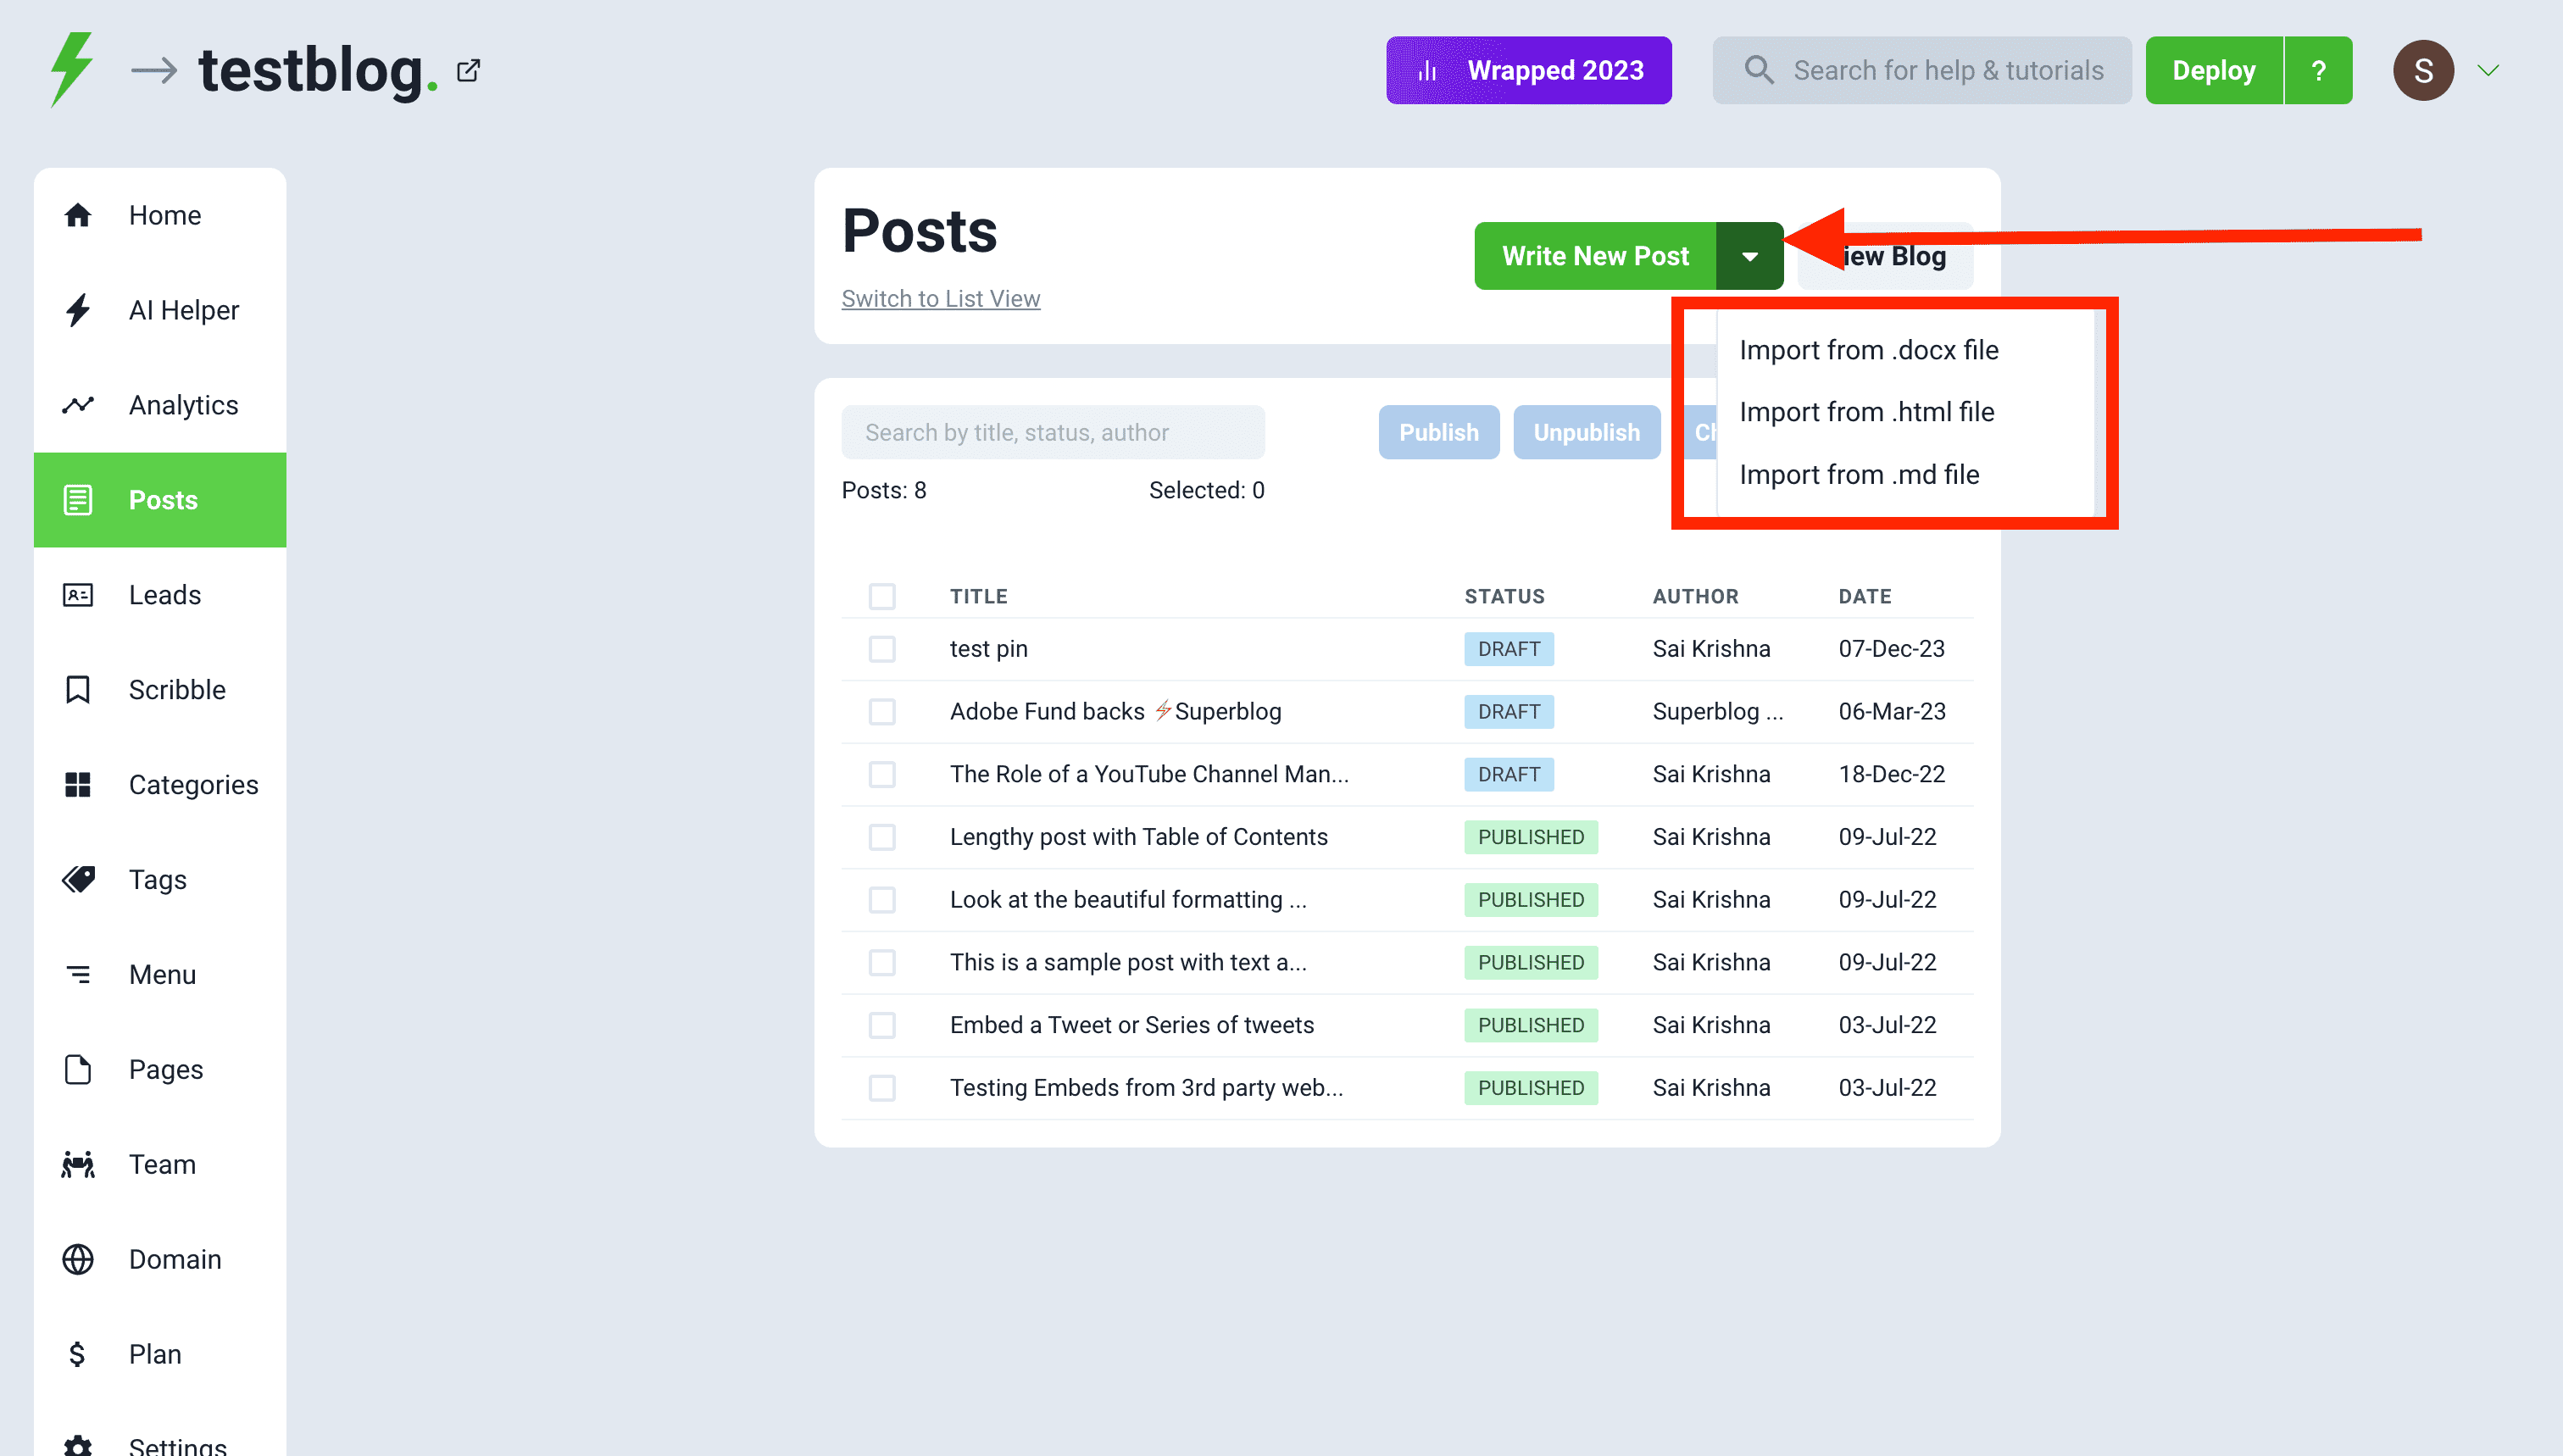
You can import post from .docx, .html, and .md files. This feature is handy if you want to write your blog posts in Google Docs, Notion, or Markdown. Simply export your post as html or docs or markdown format from anywhere and import into superblog in one click.
Editor
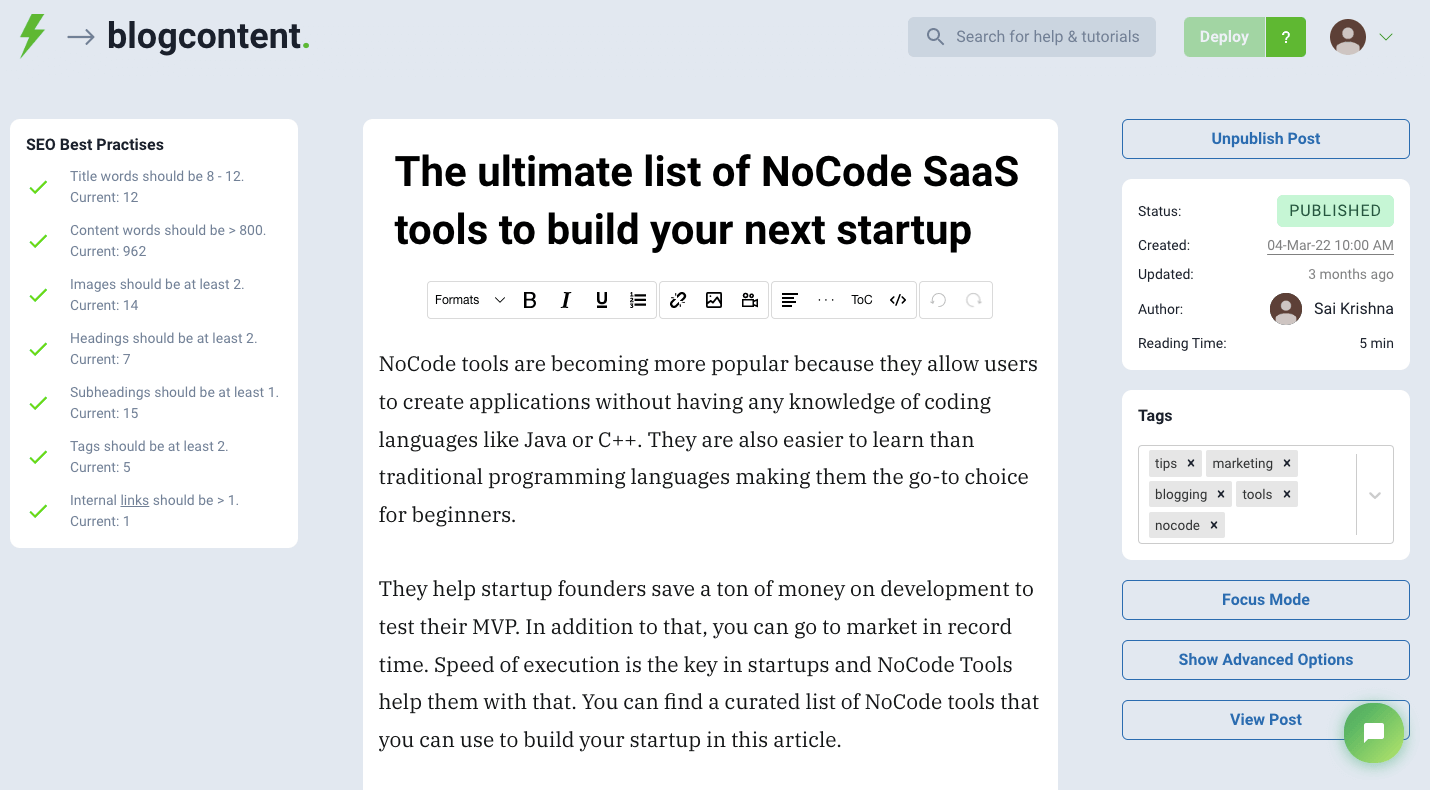
Superblog has a very advanced editor that helps you write SEO-focused content with certain restrictions for sanity. All the content you see is when you write is rendered exactly on your Superblog. This is a WYSIWYG editor and that's why no preview is required.
Features
- Text formatting - Normal, Heading, Subheading, Quote, Code
- Text style - Bold, Italic,
- List - Numbered, Normal
- Anchor links - can open in new tab
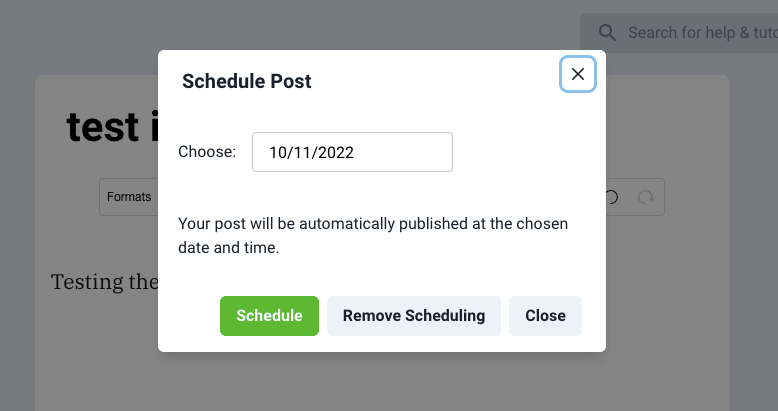
- Schedule Posts
- Upload images
- Insert videos links from Youtube/Vimeo
- Align text - left, right, center, justified
- Paragraph seperator
- Table of Contents (ToC) - can autogenerate a table of contents from the content
- Code view - you can edit the html directly
- Callout CTA section
Publish post
You can find the "Publish Post" button on the right side to the editor if a post is not published already. Click it to publish the post. (You can see its status below the action button)
Unpublish post
You can find the "Unpublish Post" button on the right side to the editor if a post is published already. Click it to unpublish the post anytime. (You can see its status below the action button)
Schedule post
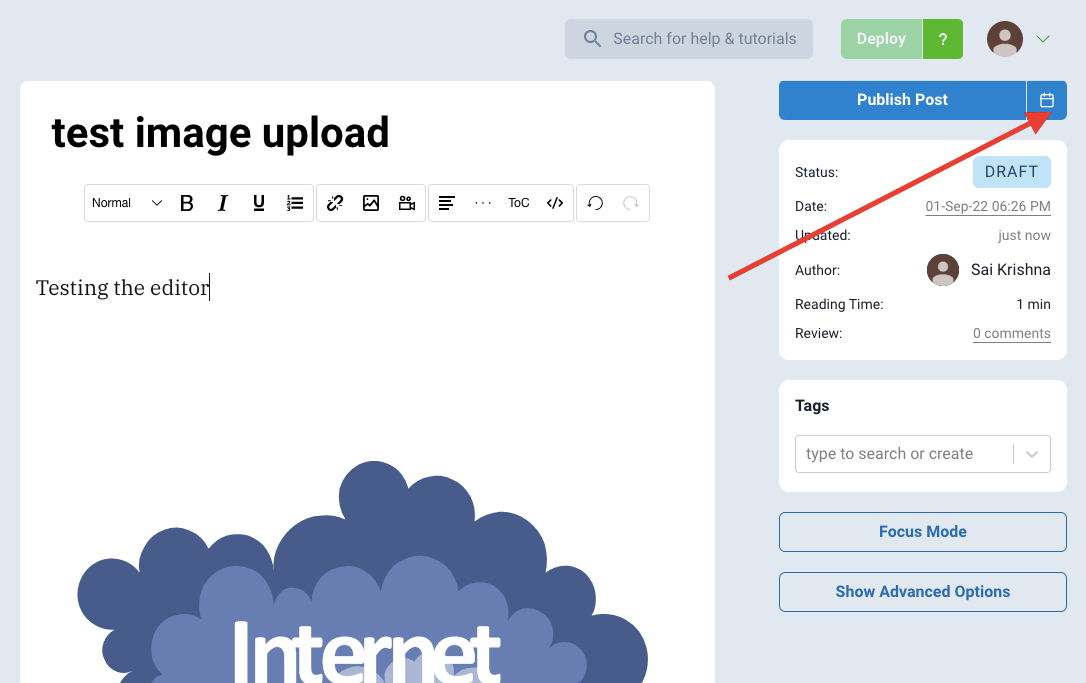
You can find the "Calender Icon" button on the right side to the editor to schedule a post.
SEO best Practices
You might have noticed the SEO Best Practices section on the post editor page. They are opiniated guidelines to make your post rank better on search engines. Let us try to understand more.
Title
This is the title of the post. Make sure your post’s title is around 8-12 words and has your post’s keyword.
Content
This is the contents of your post.
Images
Always include images in your posts. A picture is worth 1000 words.
Headings
Format your content properly. You need to have at least two headings. Write a catchy sentence to explain the section of your post and use the “Heading” format from the toolbar. Internally superblog will convert a heading to h2 which is good for SEO.
Subheadings
Format your content properly. You need to have at least 1 subheading. “Subheading” format from the toolbar. Internally superblog will convert a heading to h3 which is good for SEO.
Tags
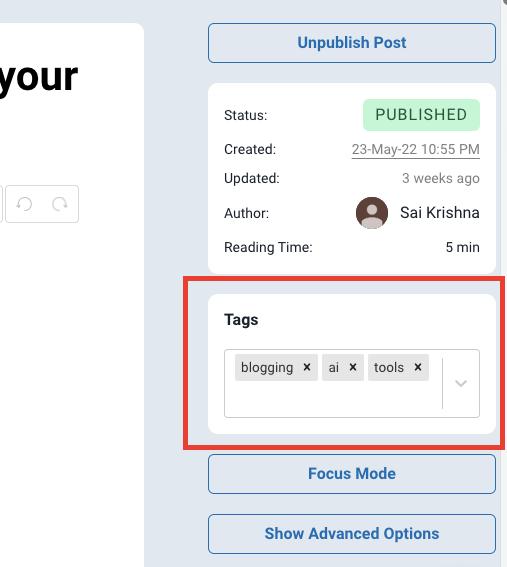
You need to tag your post with relevant topics. For example, if you are writing a post on “Impact of covid in 2021 on health care industry” then you use tags like covid, healthcare, planning etc.
You can add the tags from the right-side “tag” editor.
Internal links
This is a very high-level SEO concept. All your blog posts should link to each other. So, make sure that you add a link to posts on your blog.
For example, let us assume you have a post on your blog with the topic of “Understanding economics of scale”. If you are writing a new post with the topic of “Scaling a business with 3 proven ways” then make sure you add a link to your previous post.
Table of Contents (TOC)
Sometimes you might have a lengthy post. Or may be you just need to structure the post with headings, subheadings, and provide a glance of the post content. Superblog has this functionality built-in.
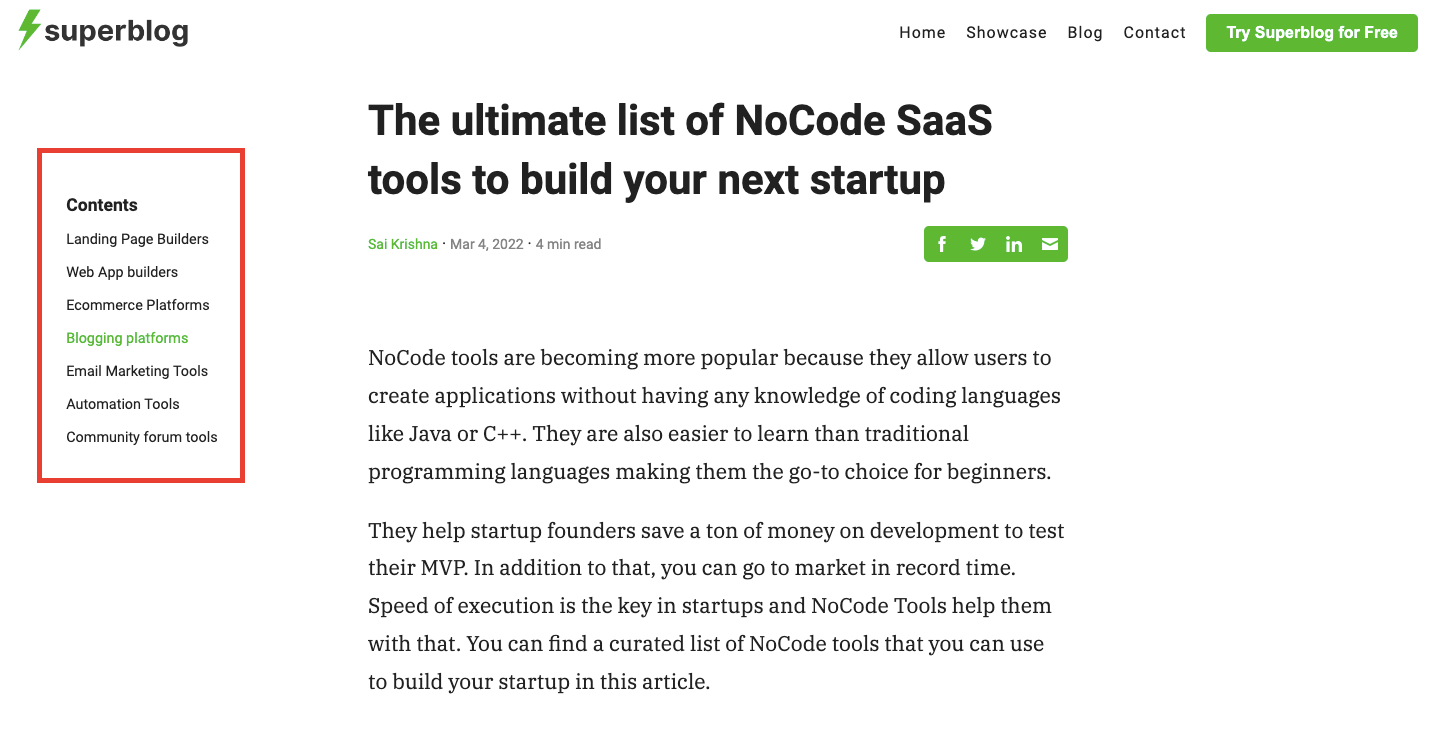
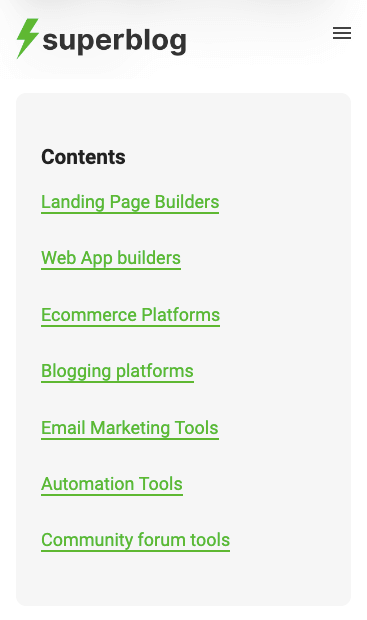
Superblog generates a ToC for every post that has Headings(h2) and Subheadings(h3) automatically. But superblog only shows h2 in the ToC container. You do not need to perform any action for to enable this. The ToC is placed at the top left of the blog post on desktops and at the beginnning of the post's body in mobiles.
If you want to disable the ToC on any post, you can do so from the "Advanced Options" of each post.
Desktop
Mobile
Change the date of creating/publishing
You can change the date of creating/publishing a post by clicking the "Date" of the post in the right side section.
Change the post author
You can change the author of a post by clicking the "Author Name" of the post in the right side section. You can assign the post to any member of your team. This can be done only by the users with roles of "OWNER", "ADMIN", or, "EDITOR".
Review
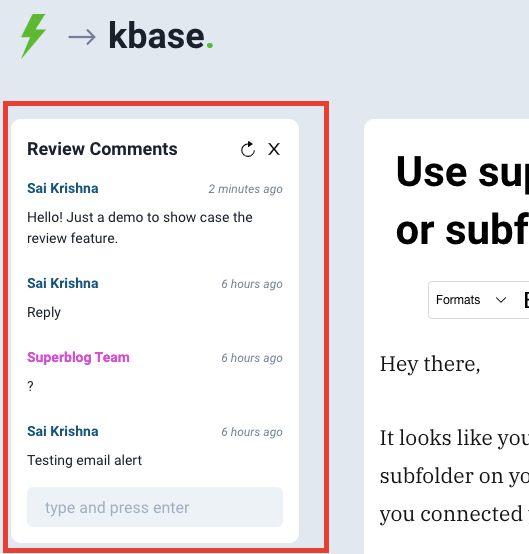
Team members (editors, admins, owner) can review a post and leave comments in the editor itself. An email notification will be sent for each comment to the post's author and to anyone else that participated in the review.
Tags
You can add related tags to a post. These will be added to your post as meta keywords. Be wise, do NOT stuff keywords here. Your readers can browse posts based on the tags.
Preview
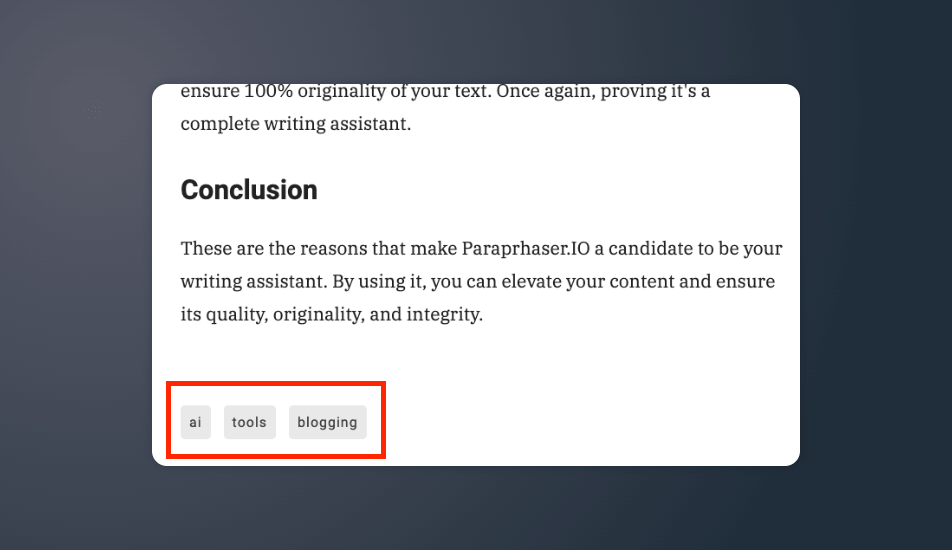
This is how the tags added to a post are displayed on your Superblog.
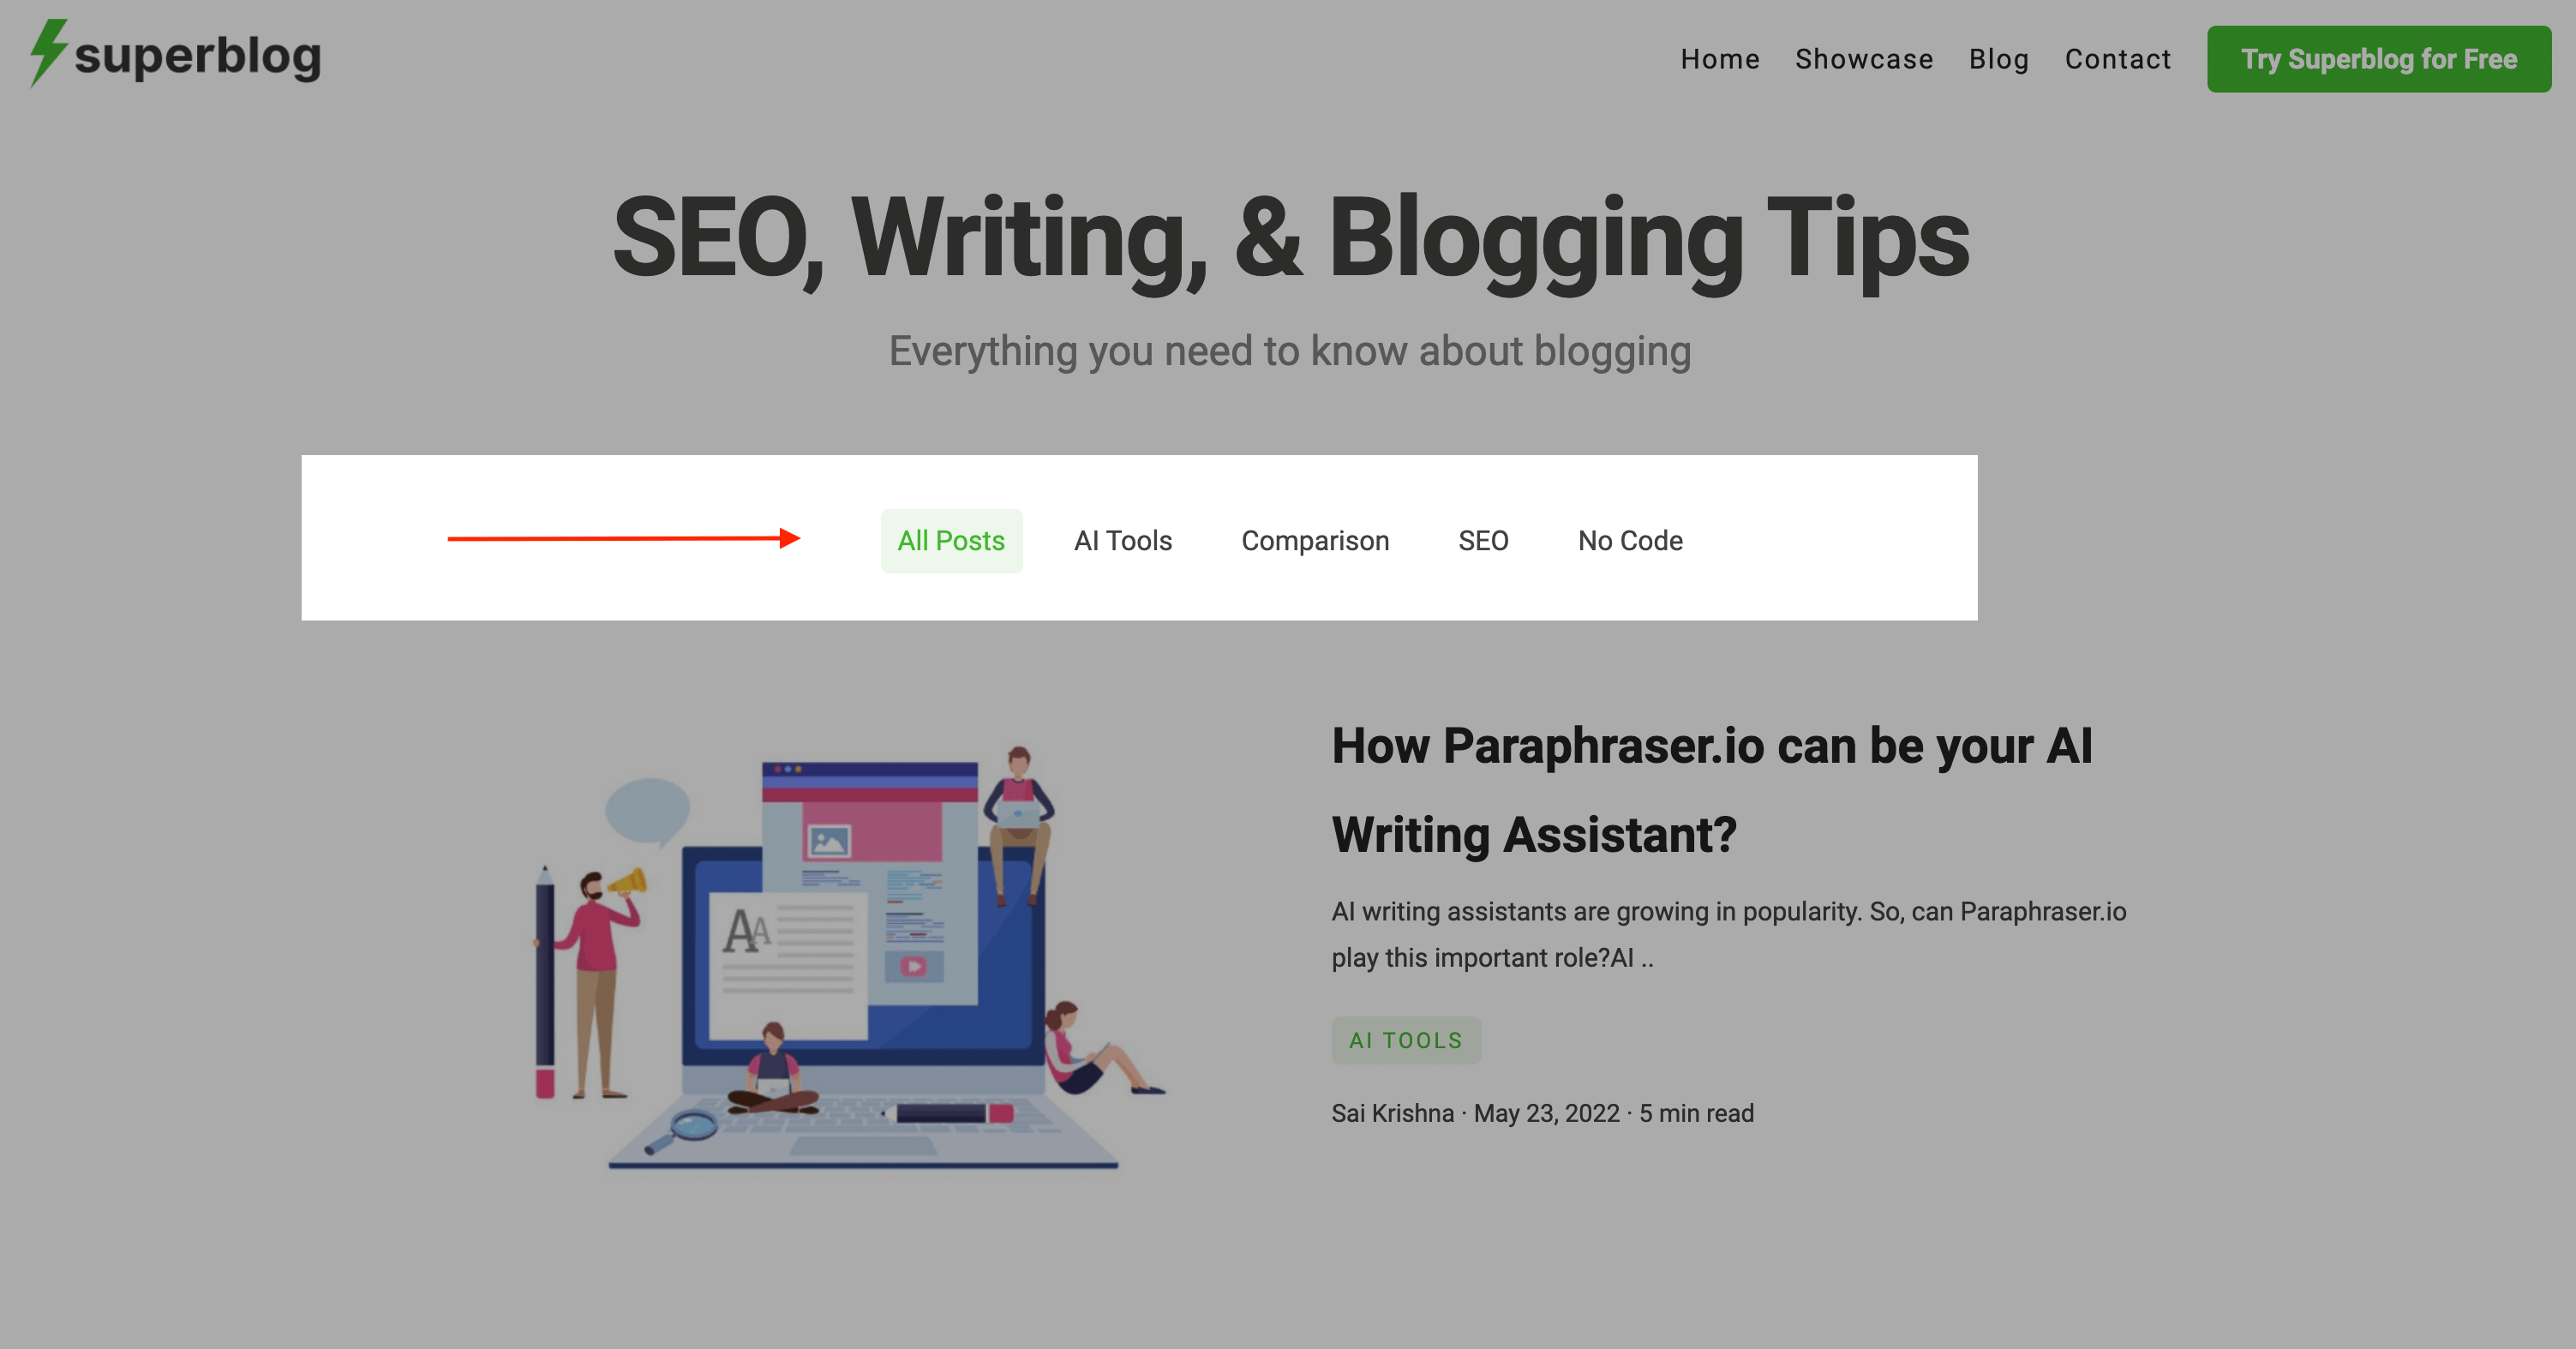
Categories
You can create categories to group your posts. Select or create new Category in the post editor page.
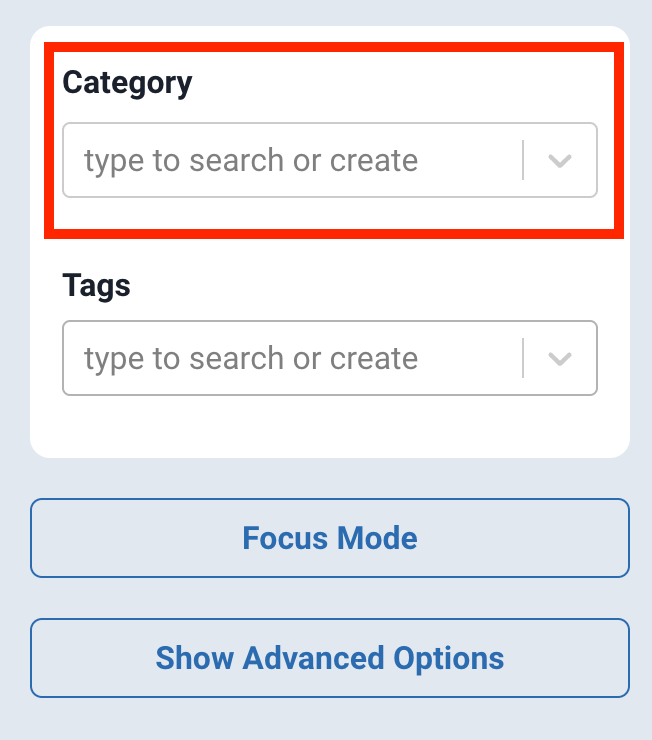
Then you can choose what categories to be dispalyed on the homepage.
Callout CTA Section
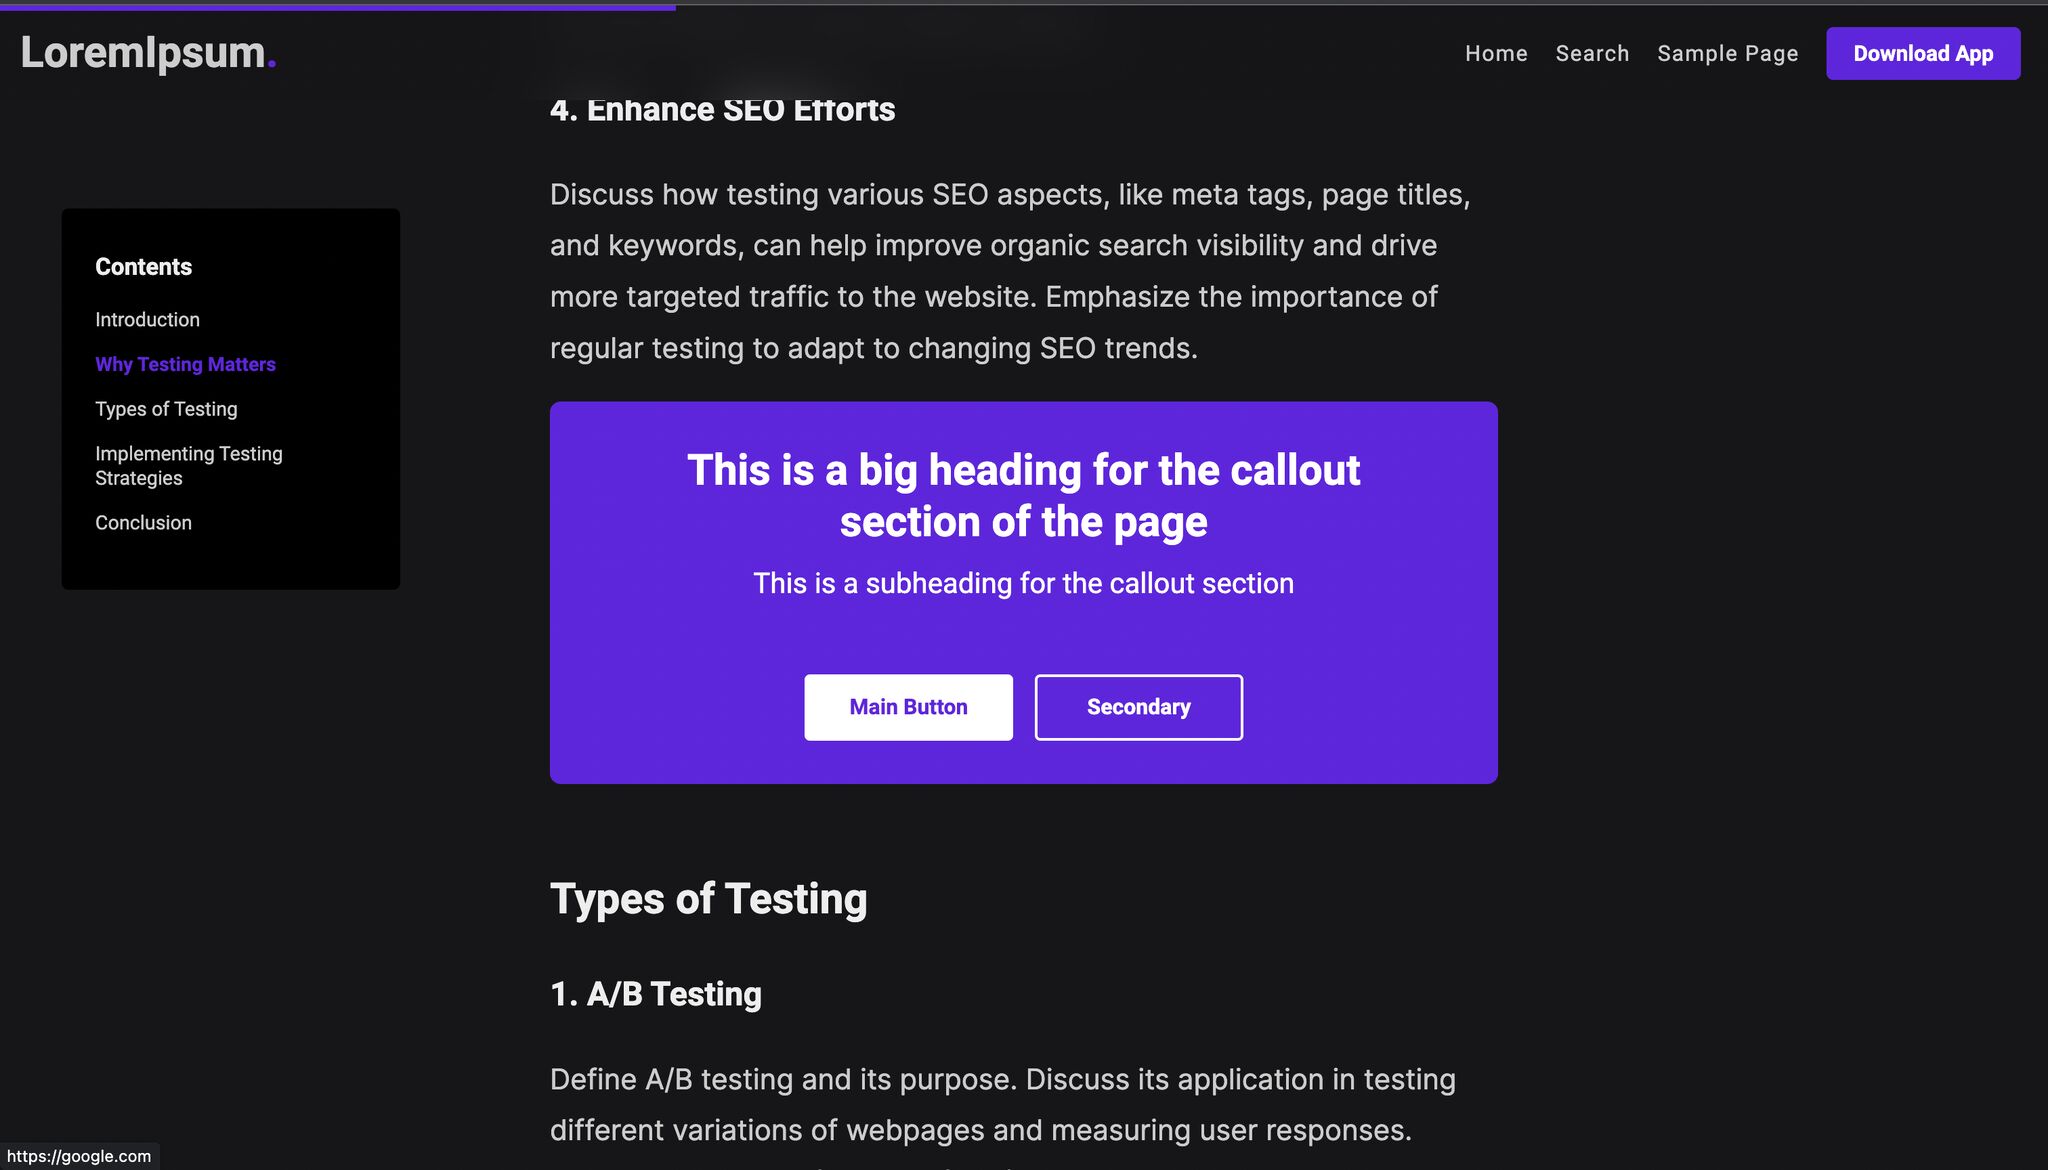
You can add a bold callout CTA section in your post to drive traffic from a blog post to your required destination url. You need to click the "CO" button in the editor's toolbar.
Preview
Advanced Options
There are several advanced options to modify a post if you want finer control. Click the Advanced Options button to see them.
Social sharing icons
You can show/hide social sharing icons for each post. A global setting is also available to enable/disable for blog-wide control.
Click the Advanced Options button in the post editor to see this button (you can find it on the right side).
Comments
You can show/hide comments for each post. A global setting is also available to enable/disable for blog-wide control.
Click the Advanced Options button in the post editor to see this button (you can find it on the right side).
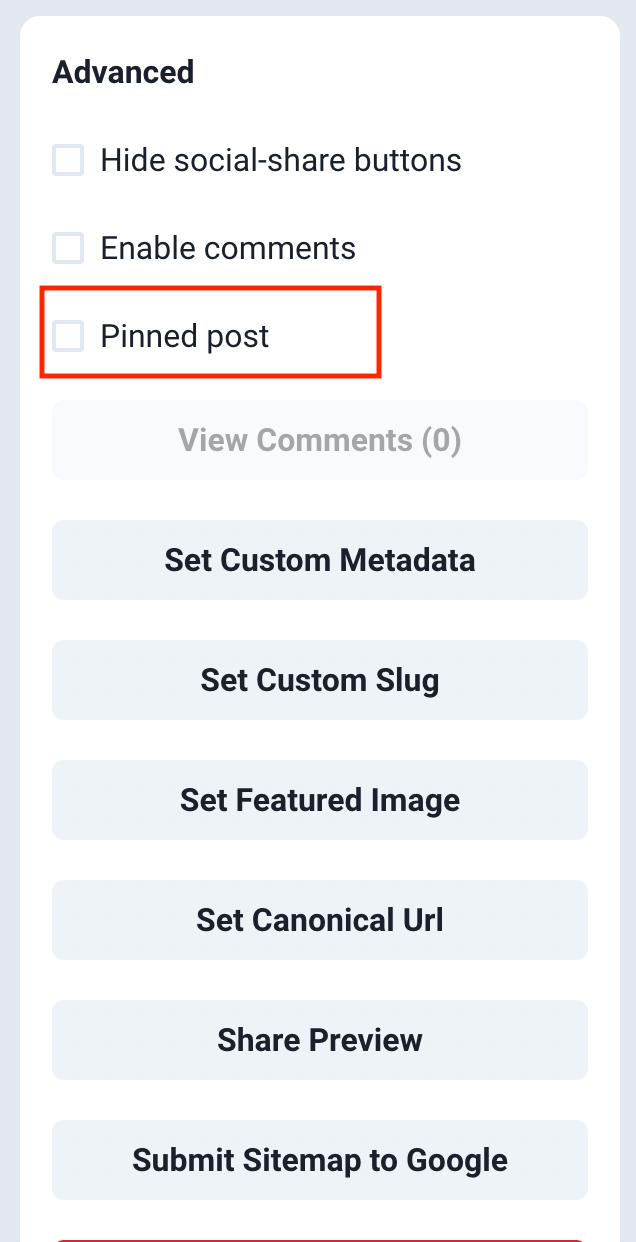
Pinned post
You can pin a post to the top by checking this box. It will be always displayed on the home page as a featured post.
Click the Advanced Options button in the post editor to see this button (you can find it on the right side).
Meta Title & Description
You can set a post's meta title and description by clicking the "Set Post Metadata" button. This is an advanced option and should be modified ONLY if you know what you are doing.
Click the Advanced Options button in the post editor to see this button (you can find it on the right side).
Post URL/slug
Superblog automatically generates a post URL/slug from the post's title. But if you prefer assigning a custom URL/slug to the post, you can do it by clicking on the Set Custom Slug button.
Click the Advanced Options button in the post editor to see this button (you can find it on the right side). You can also use nested slugs for a post.
Examples:
https://example.com/blog/my-post-1
https://blog.example.com/my-post-2
https://example.com/blog/travel/my-post-3
https://example.com/blog/tech/my-post-4
Note
You might have noticed a unique set of characters being attached to every post’s URL as shown below. That is the post id.
Superblog creates the post URL in the below format if you haven't set a custom slug.
Example:
https://example.com/blog/my-example-post-title-1cko8rasqs5nerasf0g
This is the standard structure for superblog URLs. You need not worry about them.
Do they affect SEO? No.
Can you change it? Yes.
You need to manually assign a slug to a post for custom URL. Otherwise the auto-generated slug will be generated using the title of the post.
Schema Markup
Schema Markup (also known as structured data) is a powerful tool for enhancing your website's SEO and improving how your content appears in search engine results. It provides search engines with additional context about your content, making it easier for them to understand and categorize your pages.
If you add FAQs to your post, they are automatically added to the Schema Markup.
Why is Schema Markup important for SEO?
Rich Snippets: Schema markup can lead to rich snippets in search results, which are more visually appealing and informative, potentially increasing click-through rates.
Improved Search Visibility: By providing clear, structured information about your content, you increase the chances of appearing in relevant search results and featured snippets.
Better Understanding by Search Engines: Schema helps search engines comprehend the context and relationships within your content, leading to more accurate indexing.
Superblog offers two ways to implement Schema Markup:
- Auto
- Manual
1. Auto
Superblog automatically adds a valid JSON schema to all your blog posts.
Default schema:
<script type="application/ld+json">
{
  "@context": "https://schema.org/",
  "@type": "BlogPosting",
  "author": [
    {
      "@type": "Person",
      "name": "<Post Author Name>",
      "url": "Author page url on your superblog"
    }
  ],
  "headline": "Post Title",
  "description": "It will be added if there is a meta description added by you"
  "image": "<Post coverimage/thumbnail url>",
  "publisher": {
    "@type": "Organization",
    "name": "<Your superblog name that you added in settings>general",
    "logo": {
      "@type": "ImageObject",
      "url": "<Your logo url that you added in settings>advanced"
    }
  }
}
</script>
Note:
Author type is Person by default. If you hide the author names via settings then this type will be set as Organisation and your website url will be added to maintain Schema standards.
2. Manual
You can add a schema markup (also known as structured data) for your posts (JSON LD/JSON+LD format) manually if you want to override the automatic schema.
Click on the Set Schema Markup button.
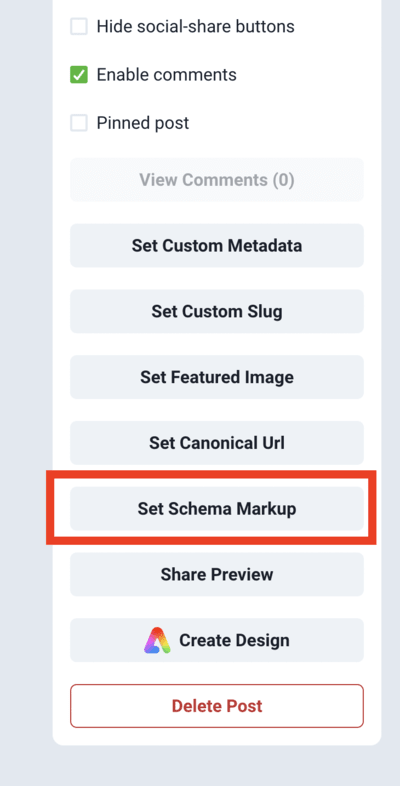
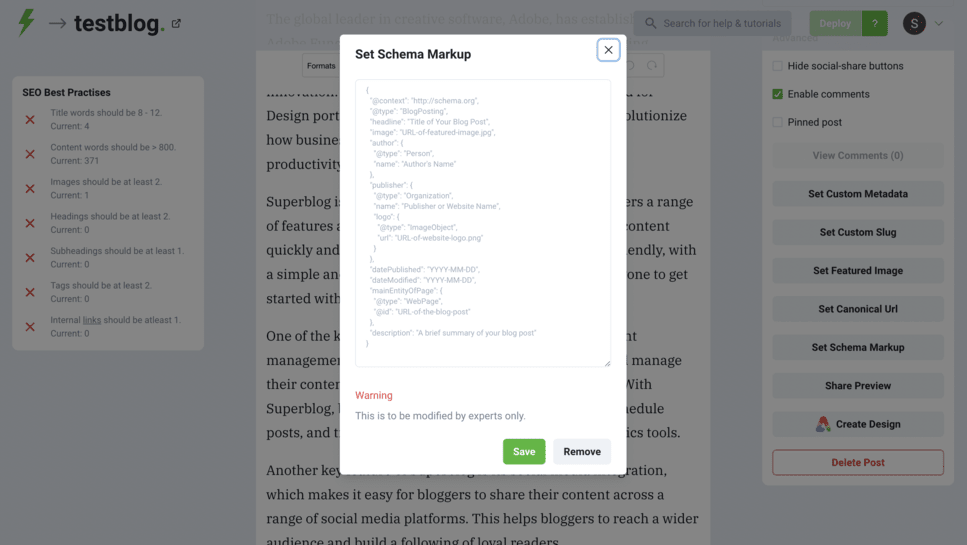
Click the Advanced Options button in the post editor to see this button (you can find it on the right side).
Example
<script type="application/ld+json">
{
    "@context": "https://schema.org/",
    "@type": "BlogPosting",
    "@id": "https://dataliberate.com/2019/05/14/library-metadata-evolution-final-mile/#BlogPosting",
    "mainEntityOfPage": "https://dataliberate.com/2019/05/14/library-metadata-evolution-final-mile/",
    "headline": "Library Metadata Evolution: The Final Mile",
    "name": "Library Metadata Evolution: The Final Mile",
    "description": "When Schema.org arrived on the scene I thought we might have arrived at the point where library metadata  could finally blossom; adding value outside of library systems to help library curated resources become first class citizens, and hence results, in the global web we all inhabit.  But as yet it has not happened.",
    "datePublished": "2019-05-14",
    "dateModified": "2019-05-14",
    "author": {
        "@type": "Person",
        "@id": "https://dataliberate.com/author/richard-wallis/#Person",
        "name": "Richard Wallis",
        "url": "https://dataliberate.com/author/richard-wallis/",
    },
    "url": "https://dataliberate.com/2019/05/14/library-metadata-evolution-final-mile/",
    "keywords": [
        "Bibframe2Schema.org",
        "Libraries",
        "Library of Congress"
    ]
}
</script>
Multiple Schema Markup
You can also add multiple schemas to a page using the same method. Just put your schemas in an array as shown below.
Example
<script type="application/ld+json">
[
    {
    "@context": "https://schema.org/",
    "@type": "BlogPosting",
    "@id": "https://dataliberate.com/2019/05/14/library-metadata-evolution-final-mile/#BlogPosting",
    "mainEntityOfPage": "https://dataliberate.com/2019/05/14/library-metadata-evolution-final-mile/",
    "headline": "Library Metadata Evolution: The Final Mile",
    "name": "Library Metadata Evolution: The Final Mile",
    "description": "When Schema.org arrived on the scene I thought we might have arrived at the point where library metadata  could finally blossom; adding value outside of library systems to help library curated resources become first class citizens, and hence results, in the global web we all inhabit.  But as yet it has not happened.",
    "datePublished": "2019-05-14",
    "dateModified": "2019-05-14",
    "author": {
        "@type": "Person",
        "@id": "https://dataliberate.com/author/richard-wallis/#Person",
        "name": "Richard Wallis",
        "url": "https://dataliberate.com/author/richard-wallis/",
    },
    "url": "https://dataliberate.com/2019/05/14/library-metadata-evolution-final-mile/",
    "keywords": [
        "Bibframe2Schema.org",
        "Libraries",
        "Library of Congress"
    ]
},

{
 "@context": "http://schema.org",
 "@type": "FAQPage",
 "name": "FAQ on Widgets",
 "description": "Find answers to the most popular questions about our range of widgets",
 "url": "https://www.example.com/faq",
 "numberOfItems": 2,
 "itemListElement":
 [
  {
   "@type": "ListItem",
   "position": 1,
   "item":
   {
    "question": "what color widgets do you sell?",
    "answer": "we sell blue and red ones"
    }
  },
  {
   "@type": "ListItem",
  "position": 2,
  "item":
   {
     "qusetion": "how much do the widgets cost?",
     "answer": "1usd each"
   }
  }
 ]
}

]
</script>
FAQ Module
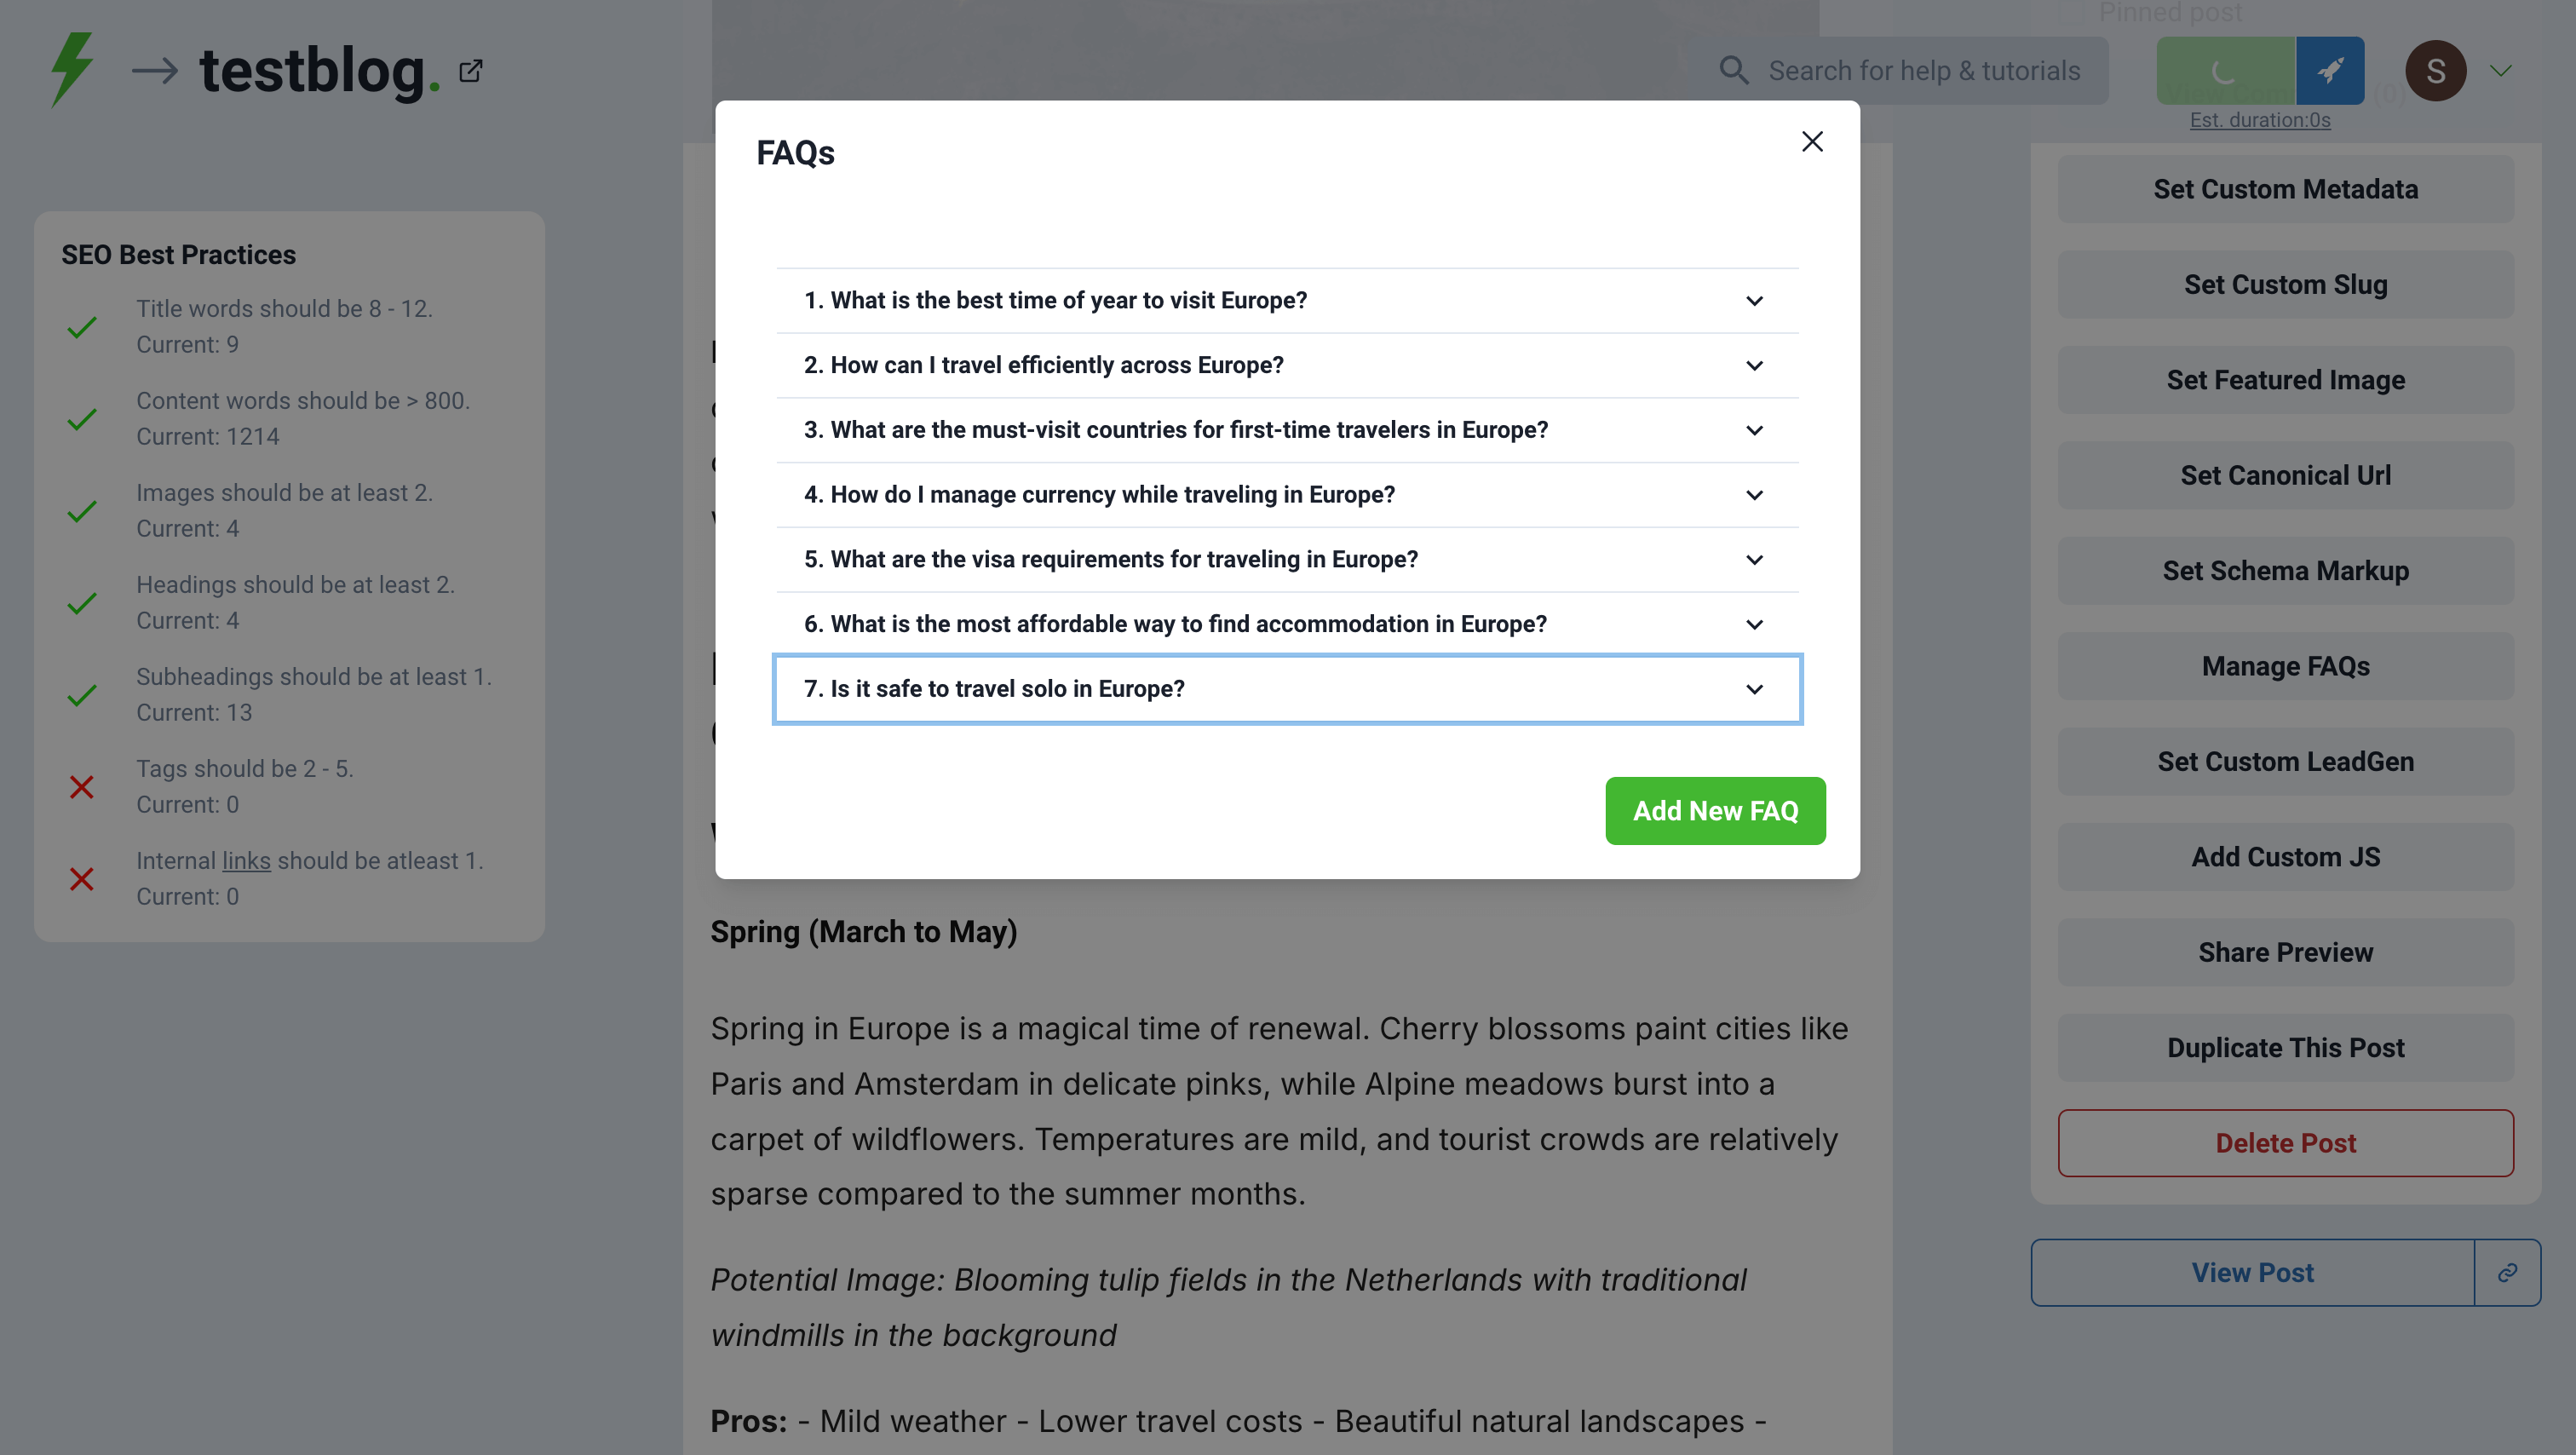
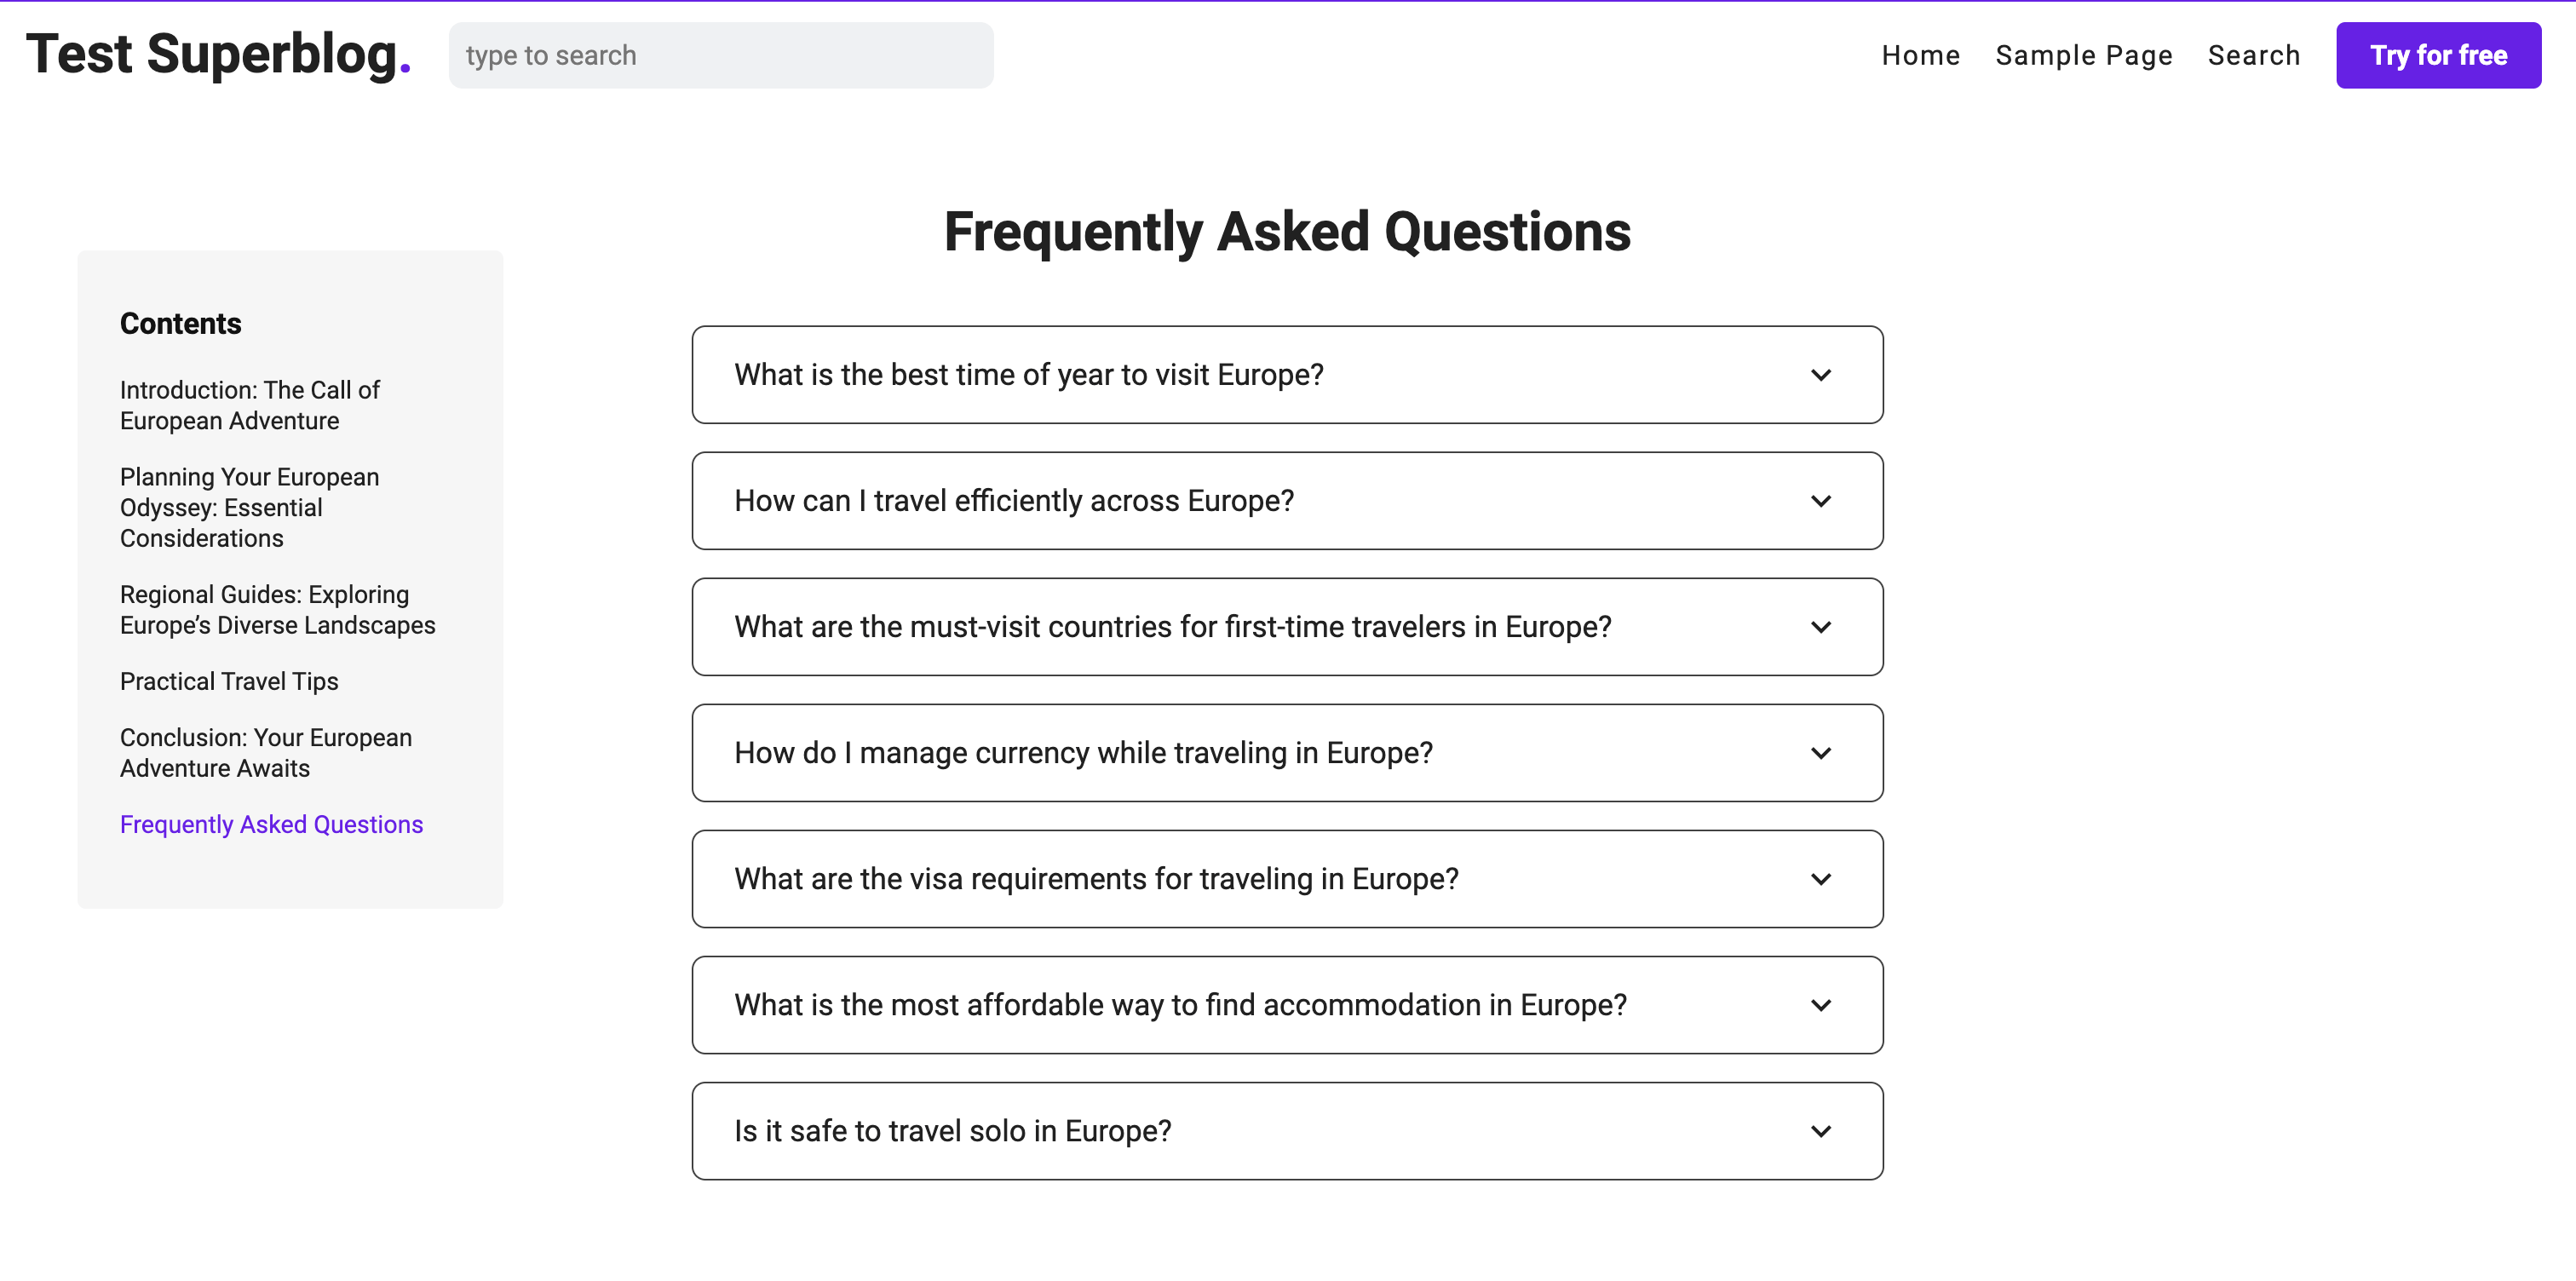
You can add a Frequently Asked Questions module to your post. Just click on the Manage FAQ button. This is generally considered as a best practice for SEO. If you add FAQs, the required Schema Markup is also automatically added to your post.
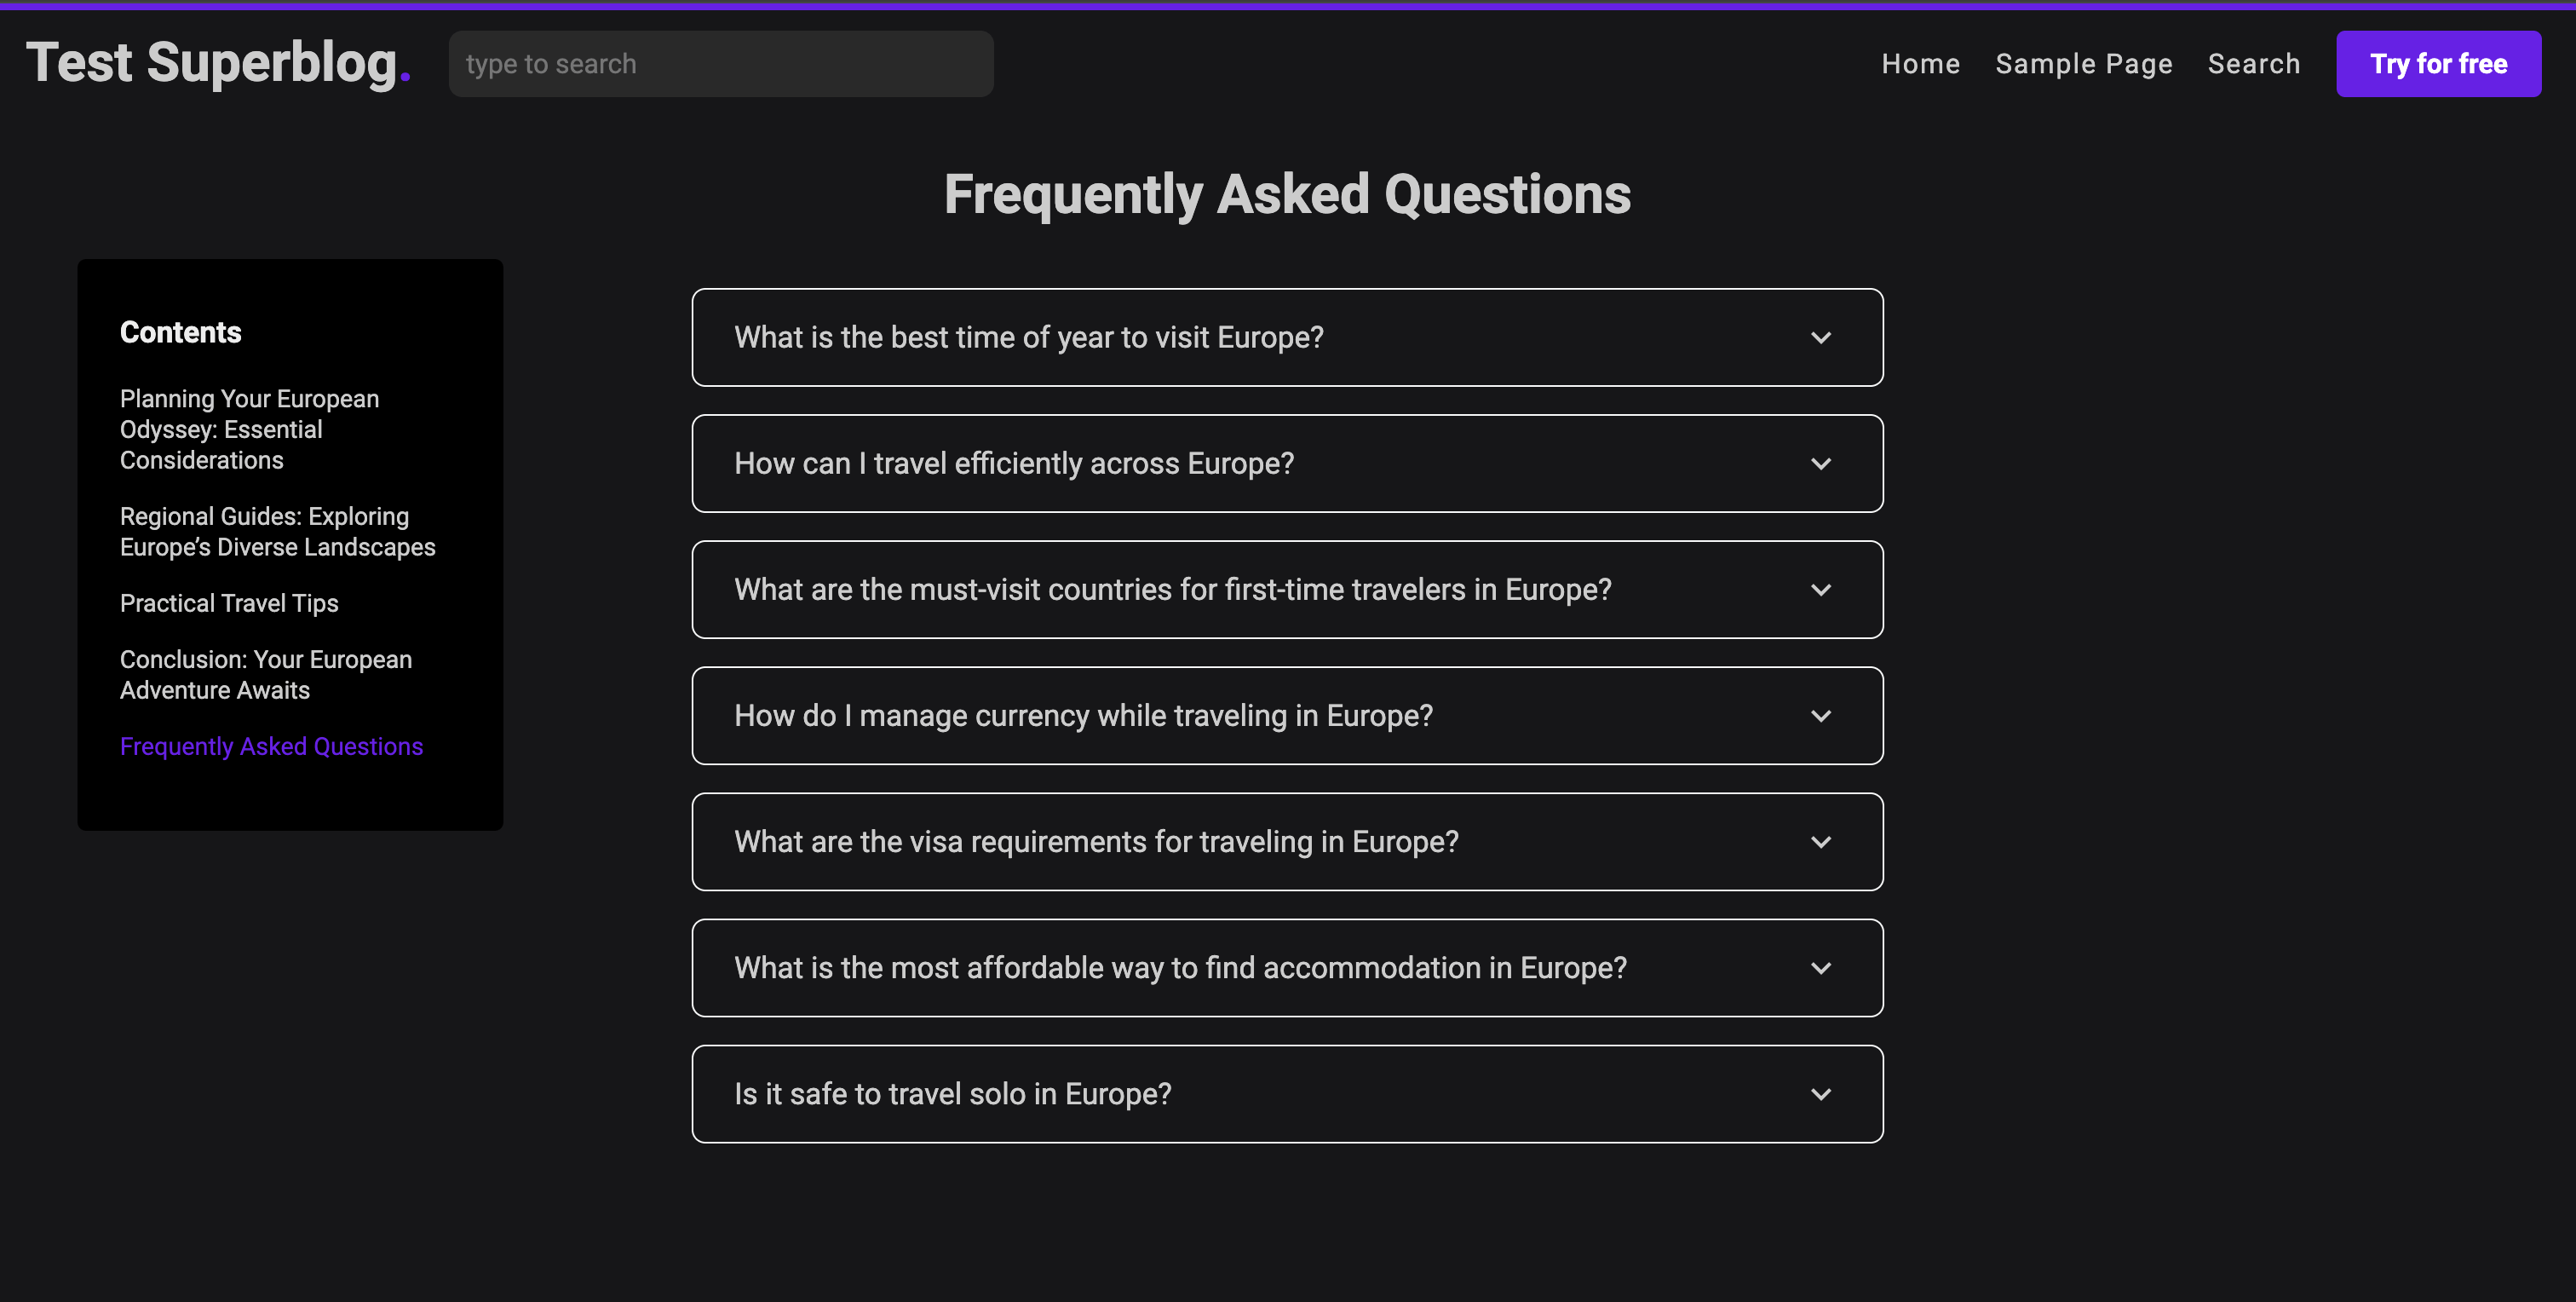
Preview
Custom Javascript
You can add custom js/code to every post easily. Click on the Add Custom JS button. Add the your <script> in the modal popup.
Share Preview
You can share a post that you are working on to someone outside of your team or to anyone with a simple link. Click on the Share Preview button.
Click the Advanced Options button in the post editor to see this button (you can find it on the right side).
Note
This is a premium feature available only in PRO and higher plans.
Custom Canonical URL
You can set a post's canonical URL by clicking the "Set Canonical Url" button. This is an advanced option and should be modified ONLY if you know what you are doing. Superblog automatically generates accurate canonical URL automatically.
Click the Advanced Options button in the post editor to see this button (you can find it on the right side).
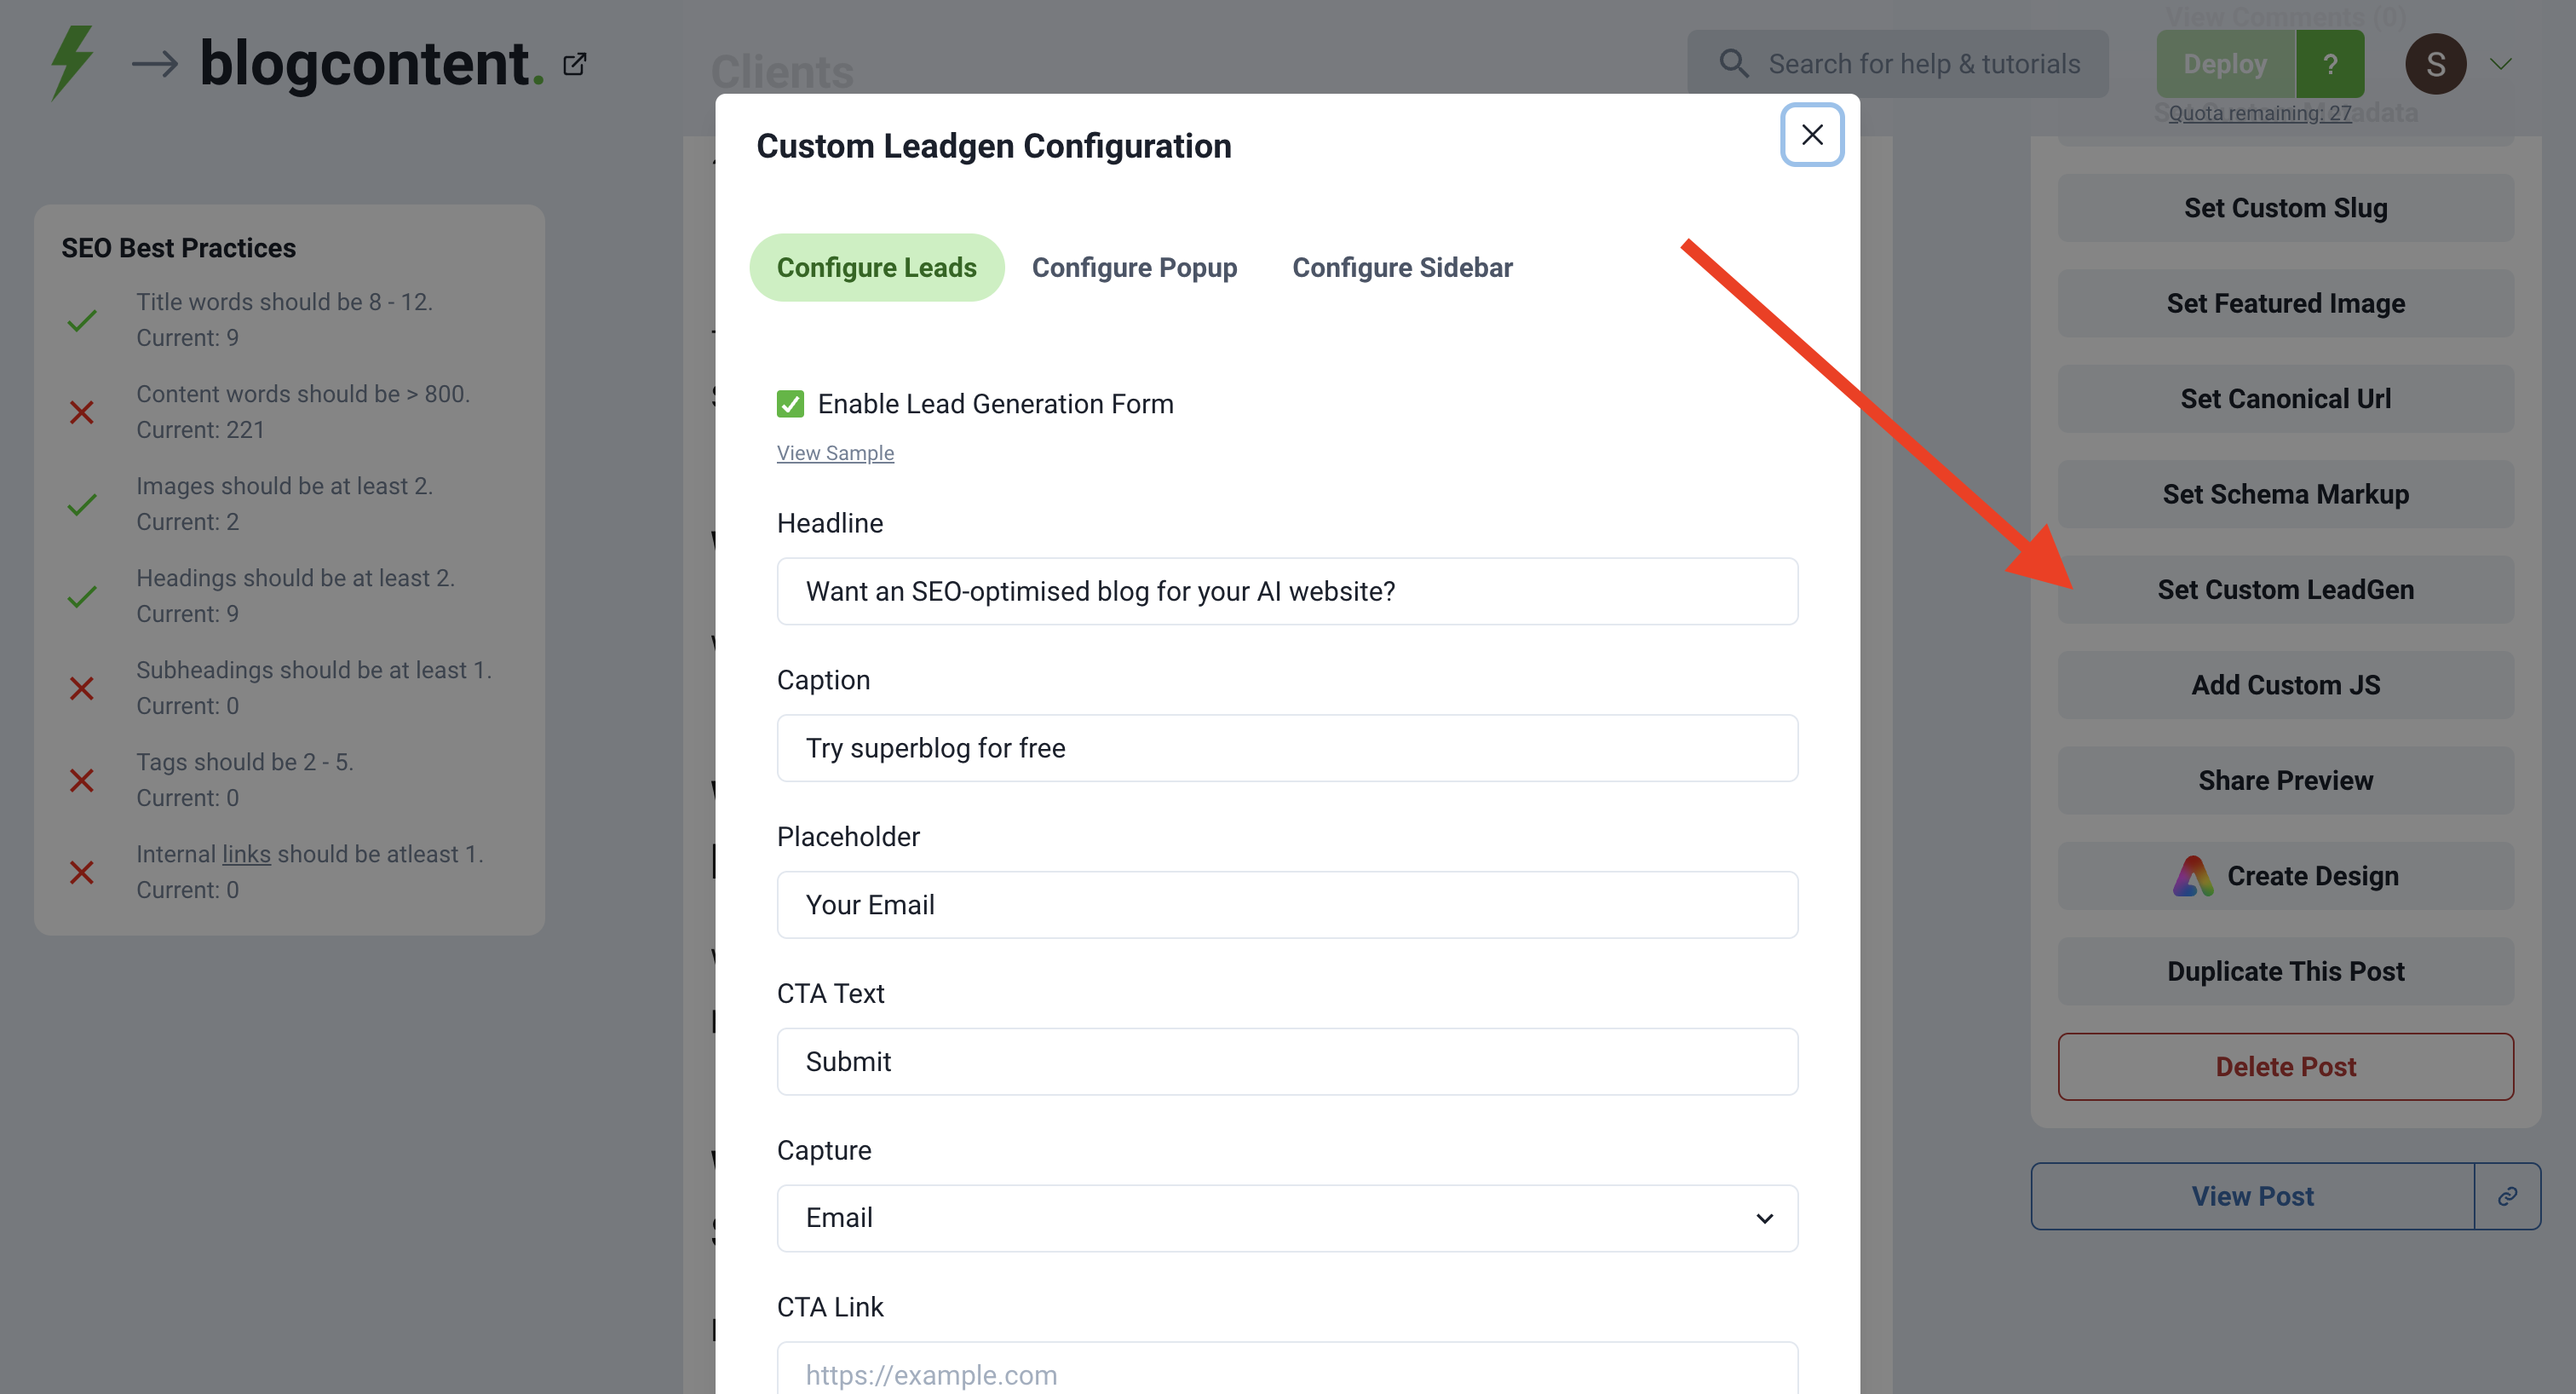
Custom Leadgen
You can add a custom leadgen form, exit intent popup or sidebar widget per post. This config will override the global leadgen settings. This is a premium feature available only in SUPER and higher plans.
Delete post
You can delete a post by clicking the "Delete Post" button. Deleted post cannot be recovered.
Click the Advanced Options button in the post editor to see this button (you can find it on the right side).
Thumbnail / Cover image
You can add a custom featured image to a post. The ratio of the cover image must be 3:2 (width: height). This image is not shown in the post. It is used for post thumbnail only. It is also used as OG Image (open graph image) for the social sharing preview.
If you don't add a featured image then Superblog uses the first image in a post as the thumbnail/cover image (banner image) for the post. The images you upload will be scaled without losing proportions accordingly. Also, the images are auto-compressed to reduce their size and load fast.
You can upload the first image to be in the ratio of 3:2 (width:height) to be displayed correctly in the cover image. If there is no image present in a post then Superblog will automatically render a dynamic image as the cover image.
If you do not add an image in your post or assign a thumbnail to your post, superblog will add beautiful dynamic thumbnails to your posts automatically.
Social Preview / OG Image
Read above
Note
If you change the first image in your post and want the social media to show the latest image as preview image then you need to force the said social media to refresh to their cache. Here is an article that explains how to refresh social media preview image.
Alternative Text vs Insert Description
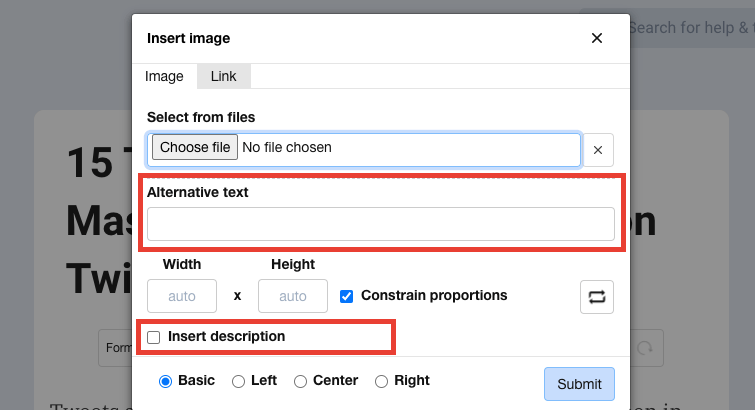
When you try to upload an image in the post editor, you can see Alternative text and Insert description fields.
- Alternative text is shown when an Image isn’t available. (standard web practice, also useful for SEO)
- Description is shown below the uploaded image. This is typically used to describe the image or credit the image's source or photographer.
Embed
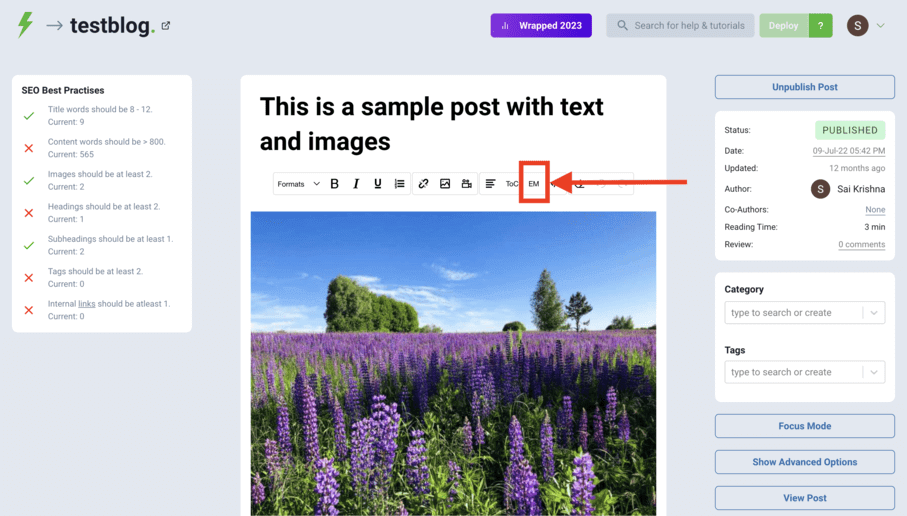
You can embed external iframes, widgets, media players, polls, quizzes, forms, etc into superblog posts.
You need to click on the "EM" button in the editor's toolbar and then paste the HTML Embed code. Give a name for your embed.
You should see a blank reserved space for the embed with the name given by you. Once you click “Deploy” and visit the post URL, you can notice that the embedded content is visible and interactive.
Sample Embed Code for Spotify
<iframe
  style="border-radius:12px"
  src="https://open.spotify.com/embed/track/4WmB04GBqS4xPMYN9dHgBw?utm_source=generator"
  width="100%" height="152" frameBorder="0" allowfullscreen=""
  allow="autoplay; clipboard-write; encrypted-media; fullscreen; picture-in-picture"
  loading="lazy">
</iframe>
Live Demo:
https://testblog.superblog.cloud/testing-embeds-from-3rd-part-websites/
Supported Image formats
You can embed images of all popular formats like PNG, JPEG, GIF, WEBP.
Some SVG images might be broken after uploading, please try to use other formats.
Internal links
You can add anchor links within the same post or page.
- Click the
code viewbutton in the editor's toolbar. - Select the text you want to link to and wrap it like this:
<span id="my-link">target element</span>. - Click the
code viewbutton again. - Select the text to add an anchor tag by clicking the
linkbutton in the toolbar. - Give the address as
#my-linkand click submit.