Data
View Dashboard > Data
All things related to your Superblog's data like import, export, and API keys are found this section.
Migrate/Import posts
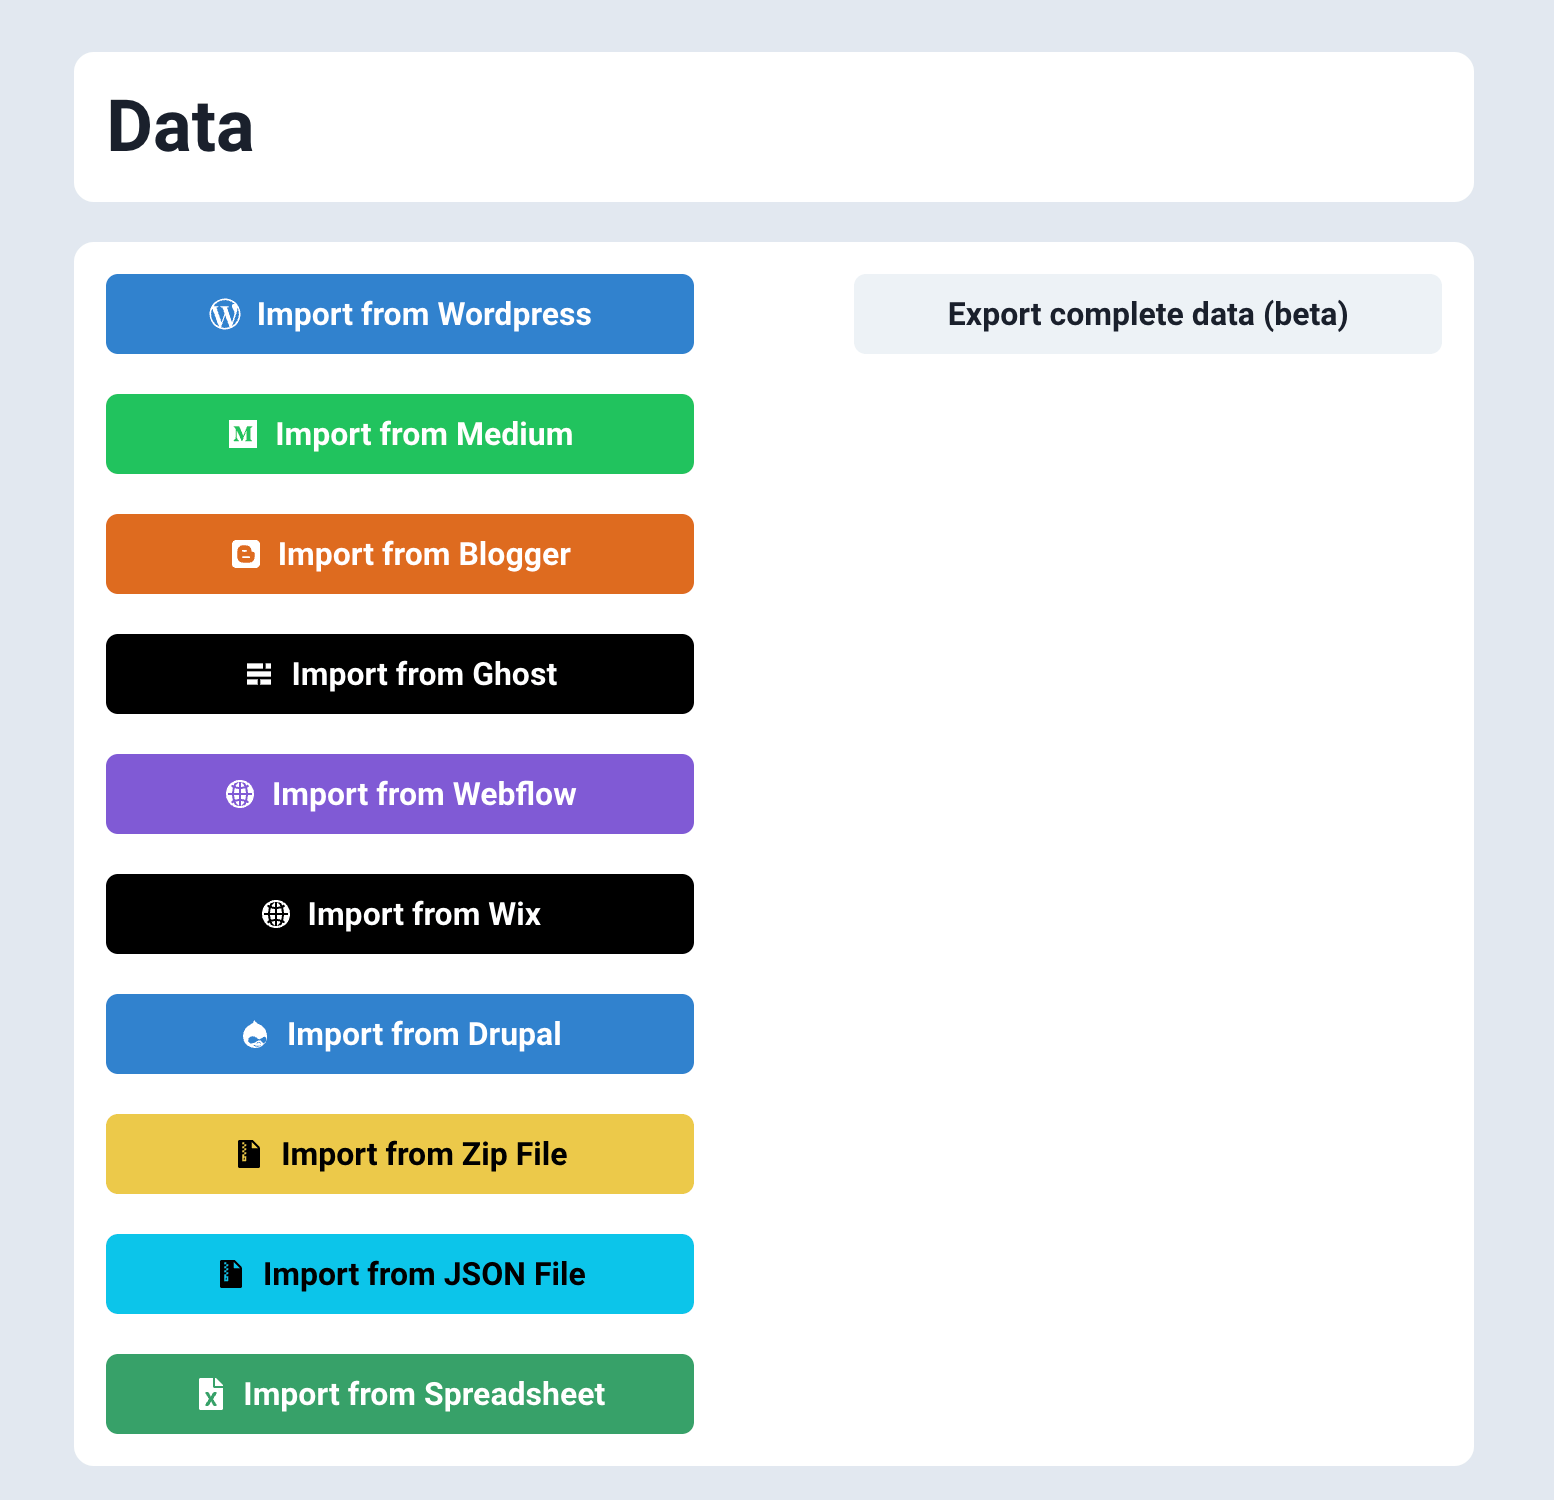
You can migrate your blog from existing platforms like WordPress, Ghost, Webflow, Blogger, Medium, Drupal, Spreadsheets, Zip files, etc. easily with one click. All your existing posts, tags, url-slugs are imported automatically.
However if you want to optimize the images and store them in Superblog CDN automatically then you need to run the migration after upgrading to a paid plan.
Superblog will gracefully try to migrate your exisitng content to suit into superblog format. Your existing URLs will NOT change. So, you don't need to worry about SEO and backlinks. All the standard HTML elements will be preserved. However you are advised to check the migrated content to ensure it is as expected.
Migrate From WordPress
You can import your existing WordPress posts to Superblog in less than 2 minutes with one click.
- Create a Superblog.
- Visit your Dashboard by clicking ‘View Dashboard’.
- Click ‘Data’ in the left sidebar.
- Click the ‘Import from WordPress' button in the ‘Data’ section.
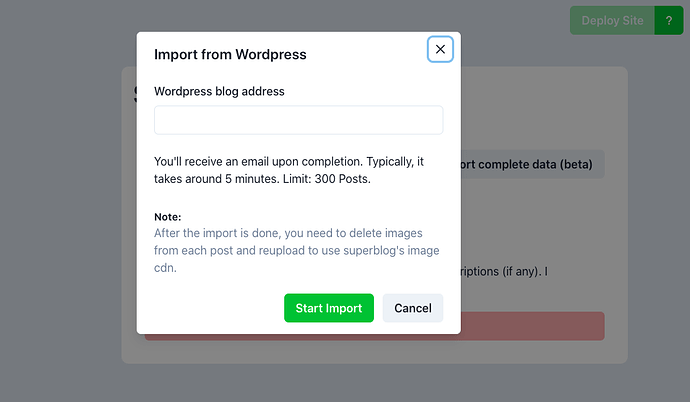
- Now, you will see a popup asking you to enter your WordPress blog’s URL.
- You need to give the URL of your WordPress installation and not the vanity URL of the blog.
Note
For example, if your WordPress installation is at the root URL of your domain called mysamplesite.com then enter http://mysamplesite.com (if you have SSL, then https).
Some people might be confused about it because they have their blog at mysamplesite.com/blog and tend to enter that URL. Always enter the URL of your WordPress installation as mentioned above.
Special cases
Sometimes, your root domain will be mysamplesite.com and your WordPress is installed in mysamplesite.com/blog. Then you need to enter https://mysamplesite.com/blog.
If your WordPress is installed at https://blog.mysamplesite.com then enter https://blog.mysamplesite.com.
Migrate From Ghost
You can import your existing Ghost posts to Superblog in less than 2 minutes with one click.

- Create a Superblog.
- Visit your Dashboard by clicking ‘View Dashboard’.
- Click ‘Data’ in the left sidebar.
- Click the ‘Import from Ghost' button in the ‘Data’ section.
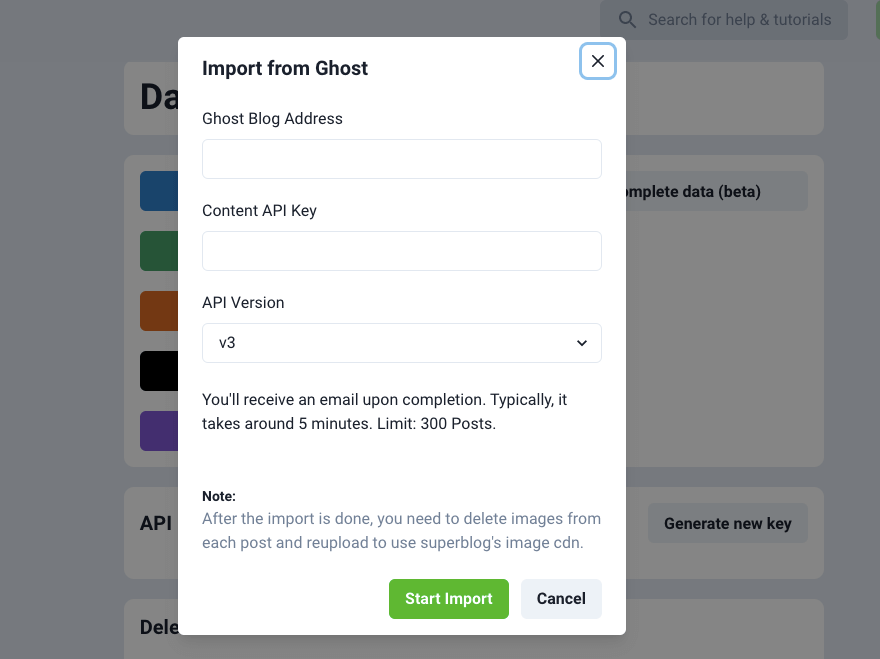
- Enter your blog’s URL, Content API Key, Select Ghost’s API Version, and click the “Start Import” button.
Note
You can get your Content API key from Ghost's admin panel.
- Login to your Ghost blog's admin planel.
- Click "Integrations" in the sidebar.
- Create a new "Custom Integration" to receive your Content API key.
Migrate From Blogger
You can import your existing Blogger posts to Superblog in less than 2 minutes with one click.

- Create a Superblog.
- Visit your Dashboard by clicking ‘View Dashboard’.
- Click ‘Data’ in the left sidebar.
- Click the ‘Import from Blogger' button in the ‘Data’ section.
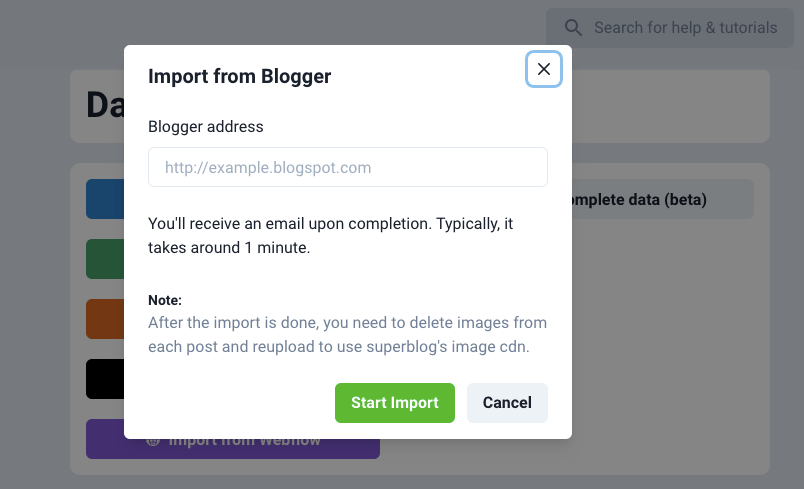
- Enter your blog’s URL and click the “Start Import” button.
Migrate From Webflow
You can import your existing Webflow posts to Superblog in less than 5 minutes with one click.

- Create a Superblog.
- Visit your Dashboard by clicking ‘View Dashboard’.
- Click ‘Data’ in the left sidebar.
- Click the ‘Import from Webflow' button in the ‘Data’ section.
- Enter your blog’s URL and click the “Start Import” button.
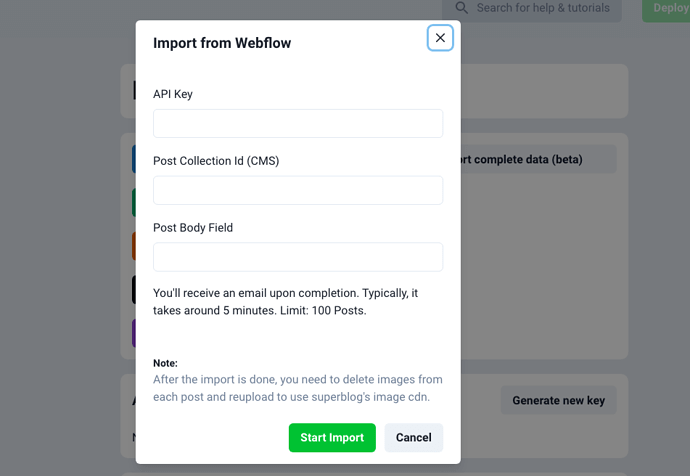
Now, you will see a popup asking you to enter your Webflow details.
They are explained below.
API key
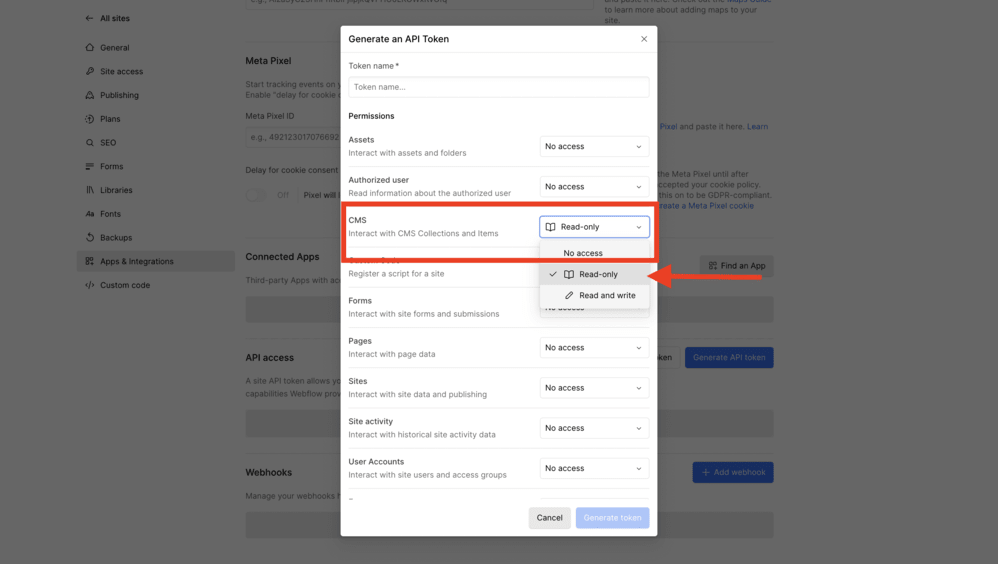
- Visit your Webflow Dashboard.
- Go to your site>settings>"Apps & Integrations".
- Scroll down to see the “Generate new API token” button and click it. (always choose v2 token)
- Select "CMS" field and choose "Read-only" access.
- Give your token a name and click "Generate" button.
- Copy-paste the API token in the above form.
Post Collection Id
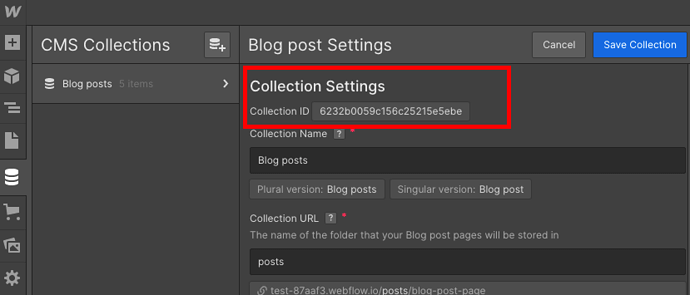
You might have created a CMS collection to write posts on your webflow site. You can visit the CMS section of your webflow site and find the ID in the settings.
Post Body Field
You might have created the Post model with certain fields in Webflow CMS. You need to enter the name of the field that holds the content of your post during migration.
For example, I created a “content” field to hold the post's body/text/html in my CMS. It could be “post-body”, “post-content”, etc in your CMS depending on who created it.
Migrate From Medium
You can import your existing Medium posts to Superblog in less than 2 minutes with one click.

- Create a Superblog.
- Visit your Dashboard by clicking ‘View Dashboard’.
- Click ‘Data’ in the left sidebar.
- Click the ‘Import from Medium' button in the ‘Data’ section.
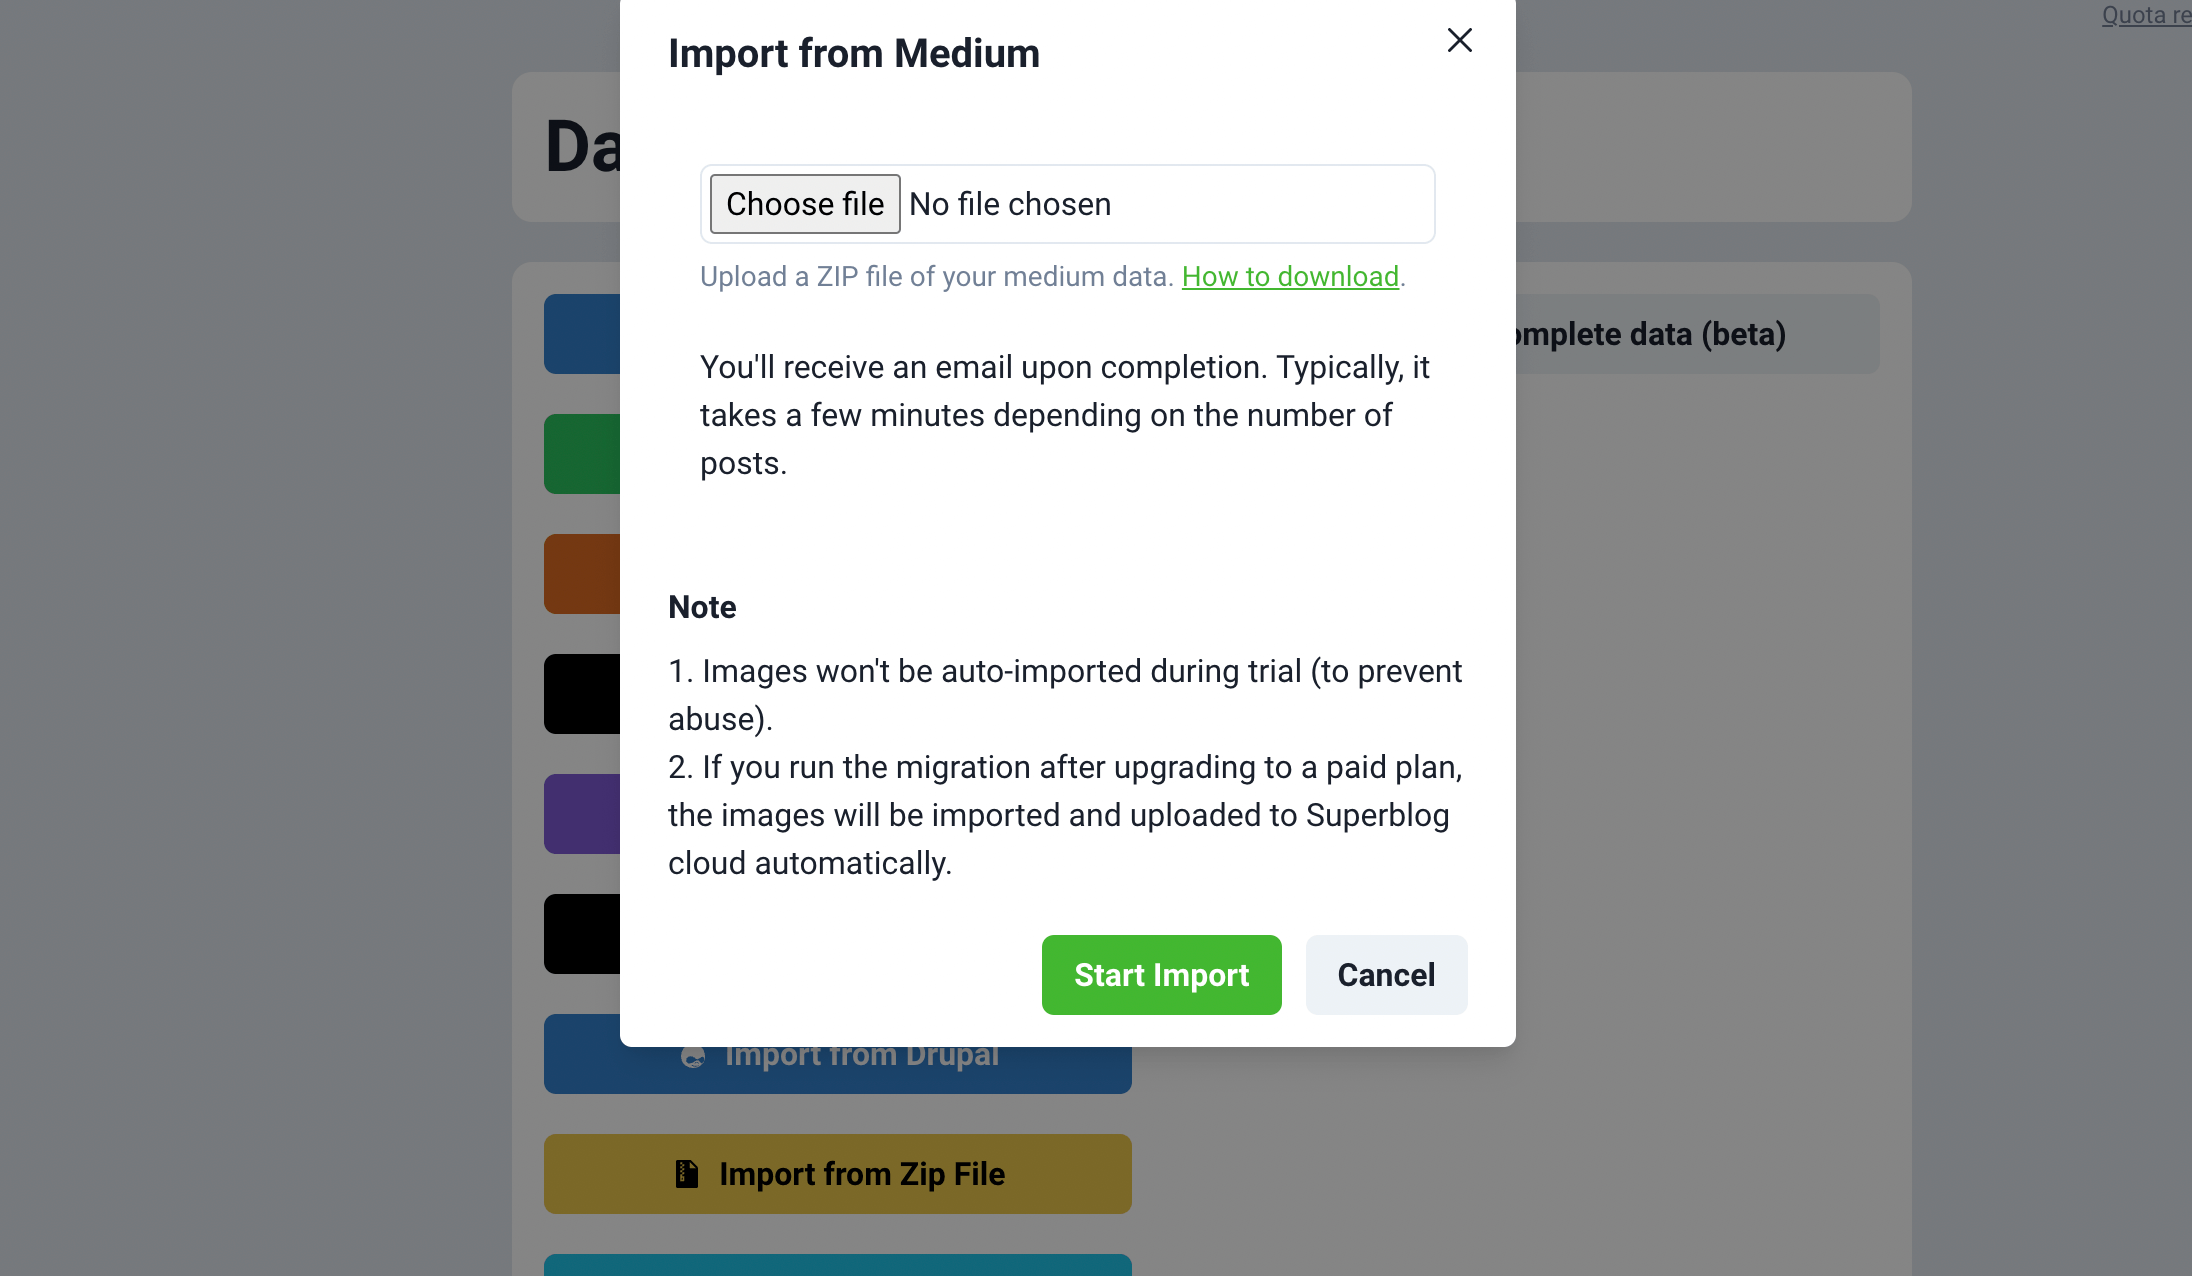
- Now, you will see a popup asking you to upload your Medium archive data zip.
- Upload the zip file and click the "Start Import" button.
Migrate From Wix
You can import your existing Wix posts to Superblog in less than 2 minutes with one click.

- Create a Superblog.
- Visit your Dashboard by clicking ‘View Dashboard’.
- Click ‘Data’ in the left sidebar.
- Click the ‘Import from Medium' button in the ‘Data’ section.
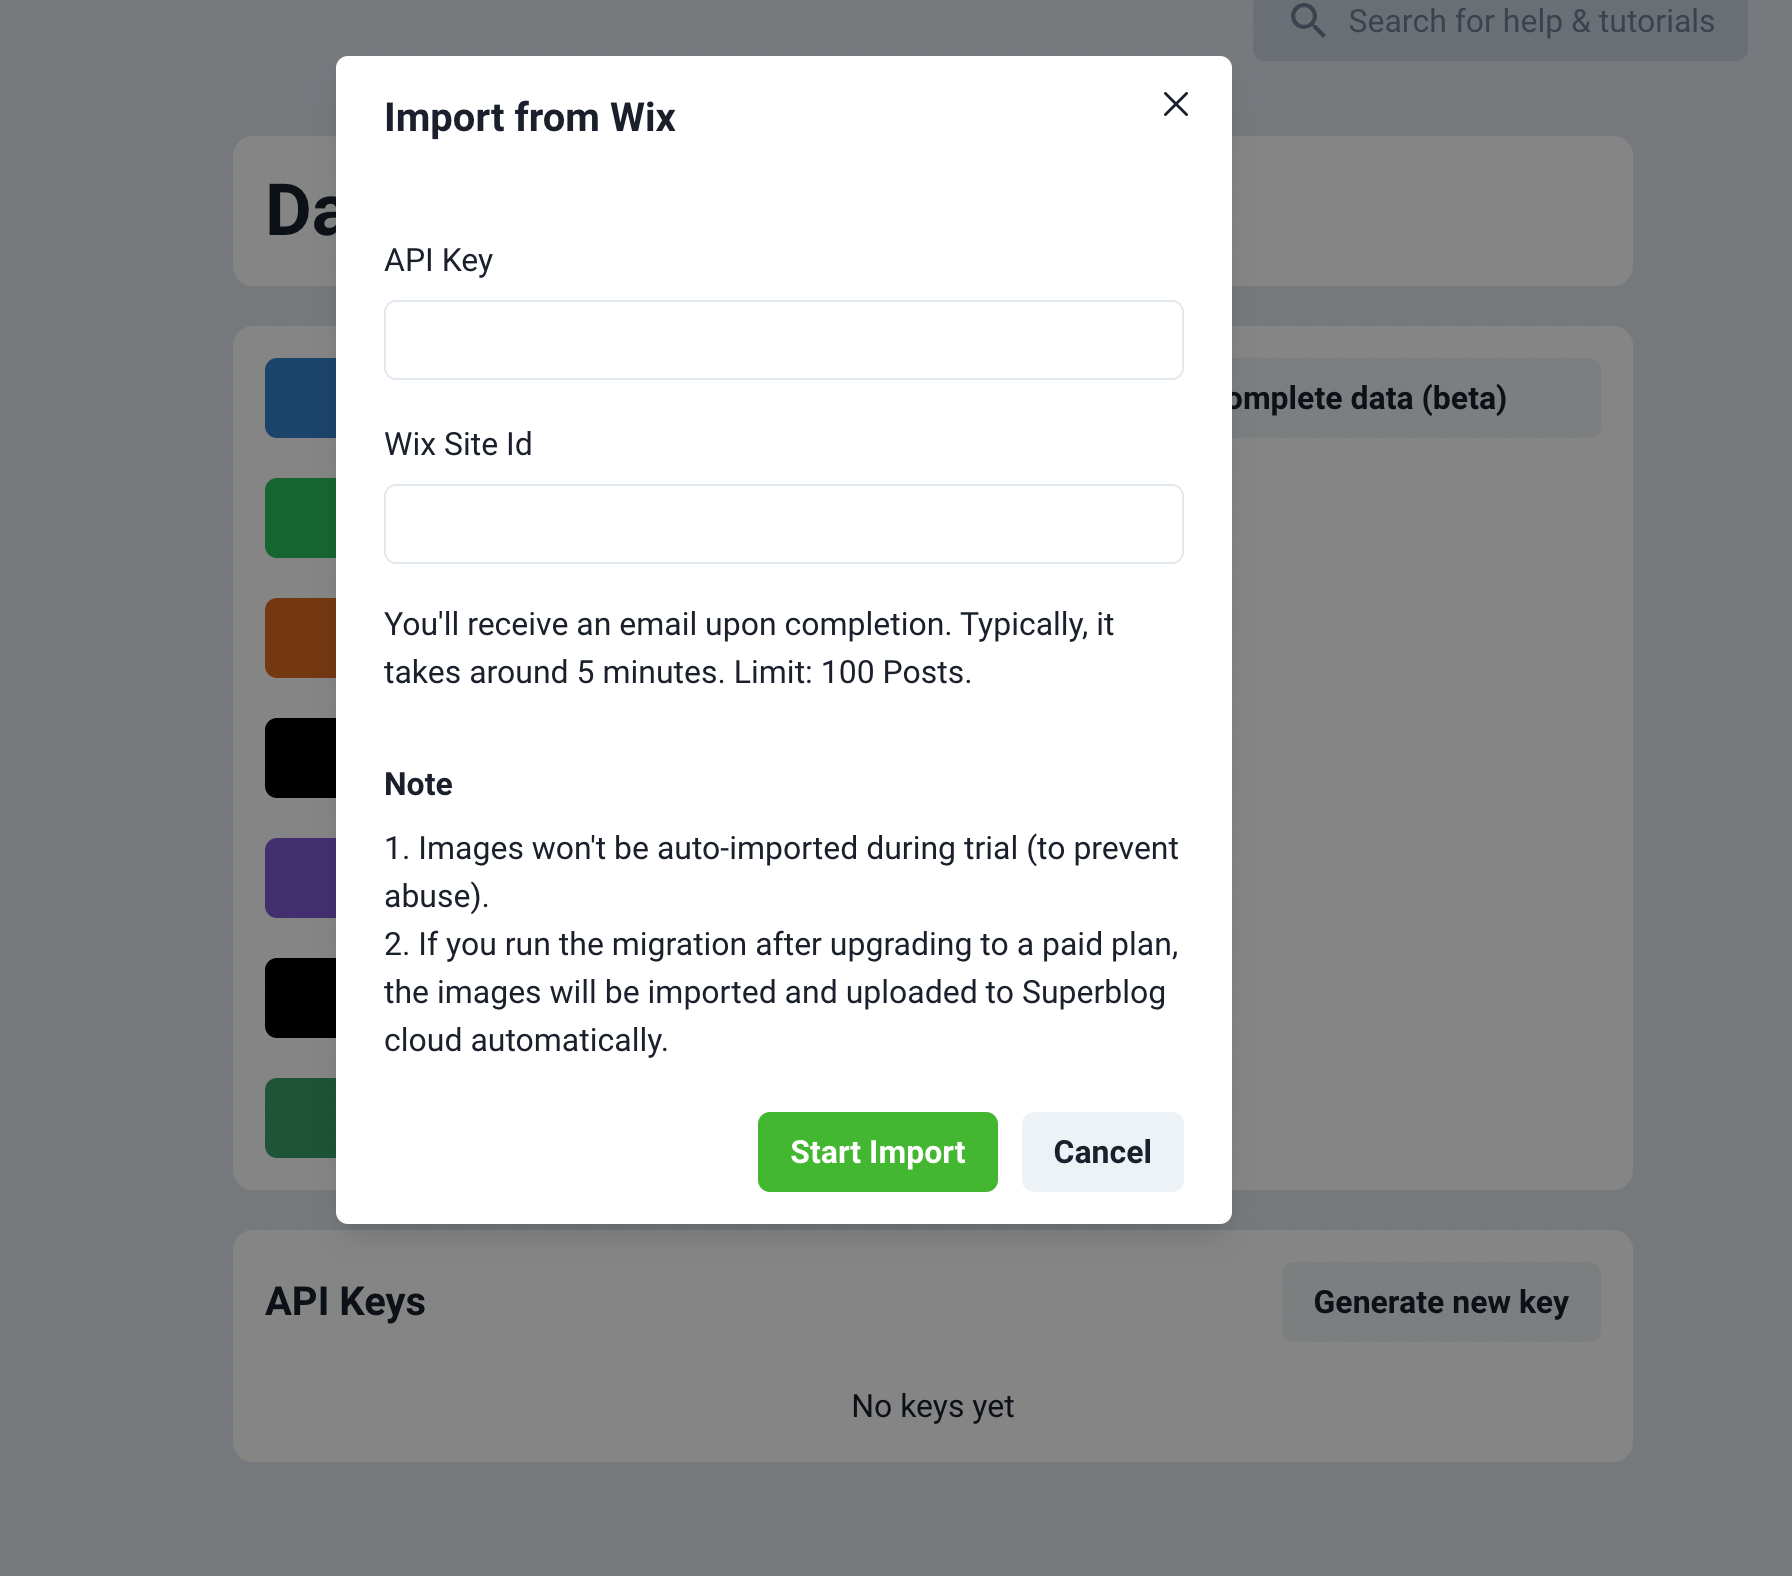
- Now, you will see a popup asking you to enter your API key and Wix Site Id.
- Enter your Wix API key and Site Id as shown here.
- Click the "Start Import" button.
Note
- Site Id will be in this format
rshmsa-a6ab-4e17-ae17-klm9dfb4e79d. - Wix API Key will be a huge string like below
IST.eyJraWQiOiJQb3pIX2FDMiIsImFsZyI6IlU2In0.eyJkYXRhIjoie1wiaWRcIjpcIjFmNTAzMjZkLTE5MzEtNDcwMS04ZTZlLTU3N2U4MzE4NzYzMVwiLFwiaWRlbnRpdHlcIjp7XCJ0eXBlXCI6XCJhcHBsaWNhdGlvblwiLFwiaWRcIjpcImI5MWNmNzRhLWNkYjgtNDg5My04OTcyLWJlZTM1MzkwY2Y2NFwifSxcInRlbmFudFwiOntcInR5cGVcIjpcImFjY2MbB73oMrFJ9kugCTDOLu7GtKjPsv-Nhp51QNslYL_E8X7_OmaFRXPzn3FRwFvAoIjDLxCfWZLlGXtZruggi5ca-TP8lANjKnVfELWPAJVY1FRp5LS5h33GW3TyqTx_gsGftvHllcL_keagVs_E5-b2_BTYXvuzovk1-EIuBeJRQeTbLw6nUQiK5bOkBTyt6rWzb_jp3LzDlswkcL5tq2s8g
Migrate from Custom CMS
If you are using a CMS like strapi or contentful or any other custom CMS then you can export your posts into JSON file.
Then use the process as explained here.
Import from Spreadsheet

You can import upto to 300 blog posts from Spreadsheet into Superblog in less than 2 minutes with one click.
- You can have the content of the blog post written in HTML or Markdown.
- The formatting of the content is retained.
- You need to be on a paid plan to use this feature.
- The spreadsheet can be of xlsx, csv or xls format.
- The spreadsheet should strictly be of this format: https://write.superblog.ai/files/import-sample.xlsx
Spreadsheet format
Your spreadsheet should contain the following columns:
- Title: This is the title of the post
- Content: This is the content of the post. It can be in HTML or Markdown format.
- Markdown: If the content column is in Markdown format, it should be "YES" otherwise "NO" (without quotes).
- Published: If you want the post to be published, it should be "YES" otherwise "NO" (without quotes).
- Date: This is the date of publishing of the post. Format: 9/13/2022 12:30:00 PM GMT+5:30
- Slug: This is the url of the post. Example: how-to-write-a-blog-post-in-2024
- Tags: This is the list of tags seperated by comma that you want to assign for the post. Ex: Tips, Tech, Tutorial
- Meta Title (optional): This is the meta title of the page.
- Meta Description (optional): This is the emta description of the page.
- Schedule DateTime (optional): You can schedule posts via spreadsheet. You can mention a date that is in future so that the posts are imported but not published. Format: 9/13/2022 12:30:00 PM GMT+5:30
- Disable Auto ToC (optional): If you want to disable auto-ToC, it should be "YES" otherwise "NO" (without quotes).
- Thumbnail URL (optional): You can assign thumbnails to your posts if you add a link to the thumbnail image here. Example: https://upload.wikimedia.org/wikipedia/en/a/a9/Example.jpg
Import from JSON file
If you have your blog posts in a JSON file then you can import them directly superblog.

How to
- Your JSON file should not have any formatting errors. It should be parsable by
JSON.parse()method. - It should contain an array of posts with fields like title, content, category, tags, etc.
- You can import 300 blog posts in one go.
Blog Post Schema Details
Title
- Description: The title of the blog post. It is a mandatory string field.
Content
- Description: The main body content of the blog post. It's a mandatory string field.
isPublished
- Description: A boolean indicating whether the post is published or not. If true, the post is visible to the public.
isMarkdown
- Description: An optional boolean field indicating whether the content is written in Markdown format.
createdAt
- Description: The creation date of the post. It must be a valid date string.
publishedAt
- Description: The date when the post was published. This must be a valid date string.
updatedAt
- Description: Reflects the last update date of the post. This must be a valid date string.
category (optional)
- Description: A field for categorizing the post. Useful for filtering posts by category on a blog platform.
tagNames (optional)
- Description: An array of strings, where each string is a tag related to the blog post. Tags help in organizing content and improving the discoverability of related posts.
slug (optional)
- Description: A string used as the URL slug for the post. This should be a URL-friendly version of the title or a custom string that helps in SEO.
metaTitle (optional)
- Description: A string used as the SEO title of the page. This is what will typically be displayed in search engine results and browser tabs.
metaDescription (optional)
- Description: A string that provides a brief summary of the post for SEO purposes. This description appears under the title in search engine results.
customFeaturedImageUrl (optional)
- Description: A URL to a custom image for the post. This can be used as a featured image in listings or headers.
Sample JSON file
[
  {
    "title": "Understanding Zod for Schema Validation",
    "content": "<p>Zod is a powerful library that simplifies the process of validation in JavaScript applications...</p>",
    "isPublished": true,
    "isMarkdown": false,
    "createdAt": "2024-04-20T14:48:00.000Z",
    "publishedAt": "2024-04-21T00:00:00.000Z",
    "updatedAt": "2024-04-21T12:00:00.000Z",
    "category": "Programming",
    "tagNames": ["JavaScript", "Validation", "Zod"],
    "slug": "understanding-zod-validation",
    "metaTitle": "Understanding Zod for Schema Validation",
    "metaDescription": "An in-depth guide on how to use Zod for schema validation in JavaScript.",
    "customFeaturedImageUrl": "https://example.com/images/zod.png"
  },
  {
    "title": "Advanced Techniques in React",
    "content": "# What is React? React offers a plethora of advanced techniques that can help developers optimize their applications...",
    "isPublished": false,
    "isMarkdown": true,
    "createdAt": "2024-04-19T09:30:00.000Z",
    "updatedAt": "2024-04-20T08:45:00.000Z",
    "publishedAt": "2024-04-20T08:45:00.000Z",
    "category": "Web Development",
    "tagNames": ["React", "Web Development", "Frontend"],
    "slug": "advanced-react-techniques",
    "metaTitle": "Advanced Techniques in React",
    "metaDescription": "Learn about advanced techniques in React to improve your web development skills.",
    "customFeaturedImageUrl": "https://example.com/images/react.png"
  },
  {
    "title": "Introduction to Svelte",
    "content": "<p>Svelte is a radical new approach to building user interfaces. Unlike traditional frameworks...</p>",
    "isPublished": true,
    "createdAt": "2024-04-18T07:20:00.000Z",
    "publishedAt": "2024-04-20T10:15:00.000Z",
    "updatedAt": "2024-04-20T11:30:00.000Z",
    "category": "Frontend Technologies",
    "tagNames": ["Svelte", "JavaScript", "UI"],
    "slug": "intro-to-svelte",
    "metaTitle": "Introduction to Svelte",
    "metaDescription": "Discover Svelte, a new way to build efficient, fast, and reactive web interfaces.",
    "customFeaturedImageUrl": "https://example.com/images/svelte.png"
  }
]
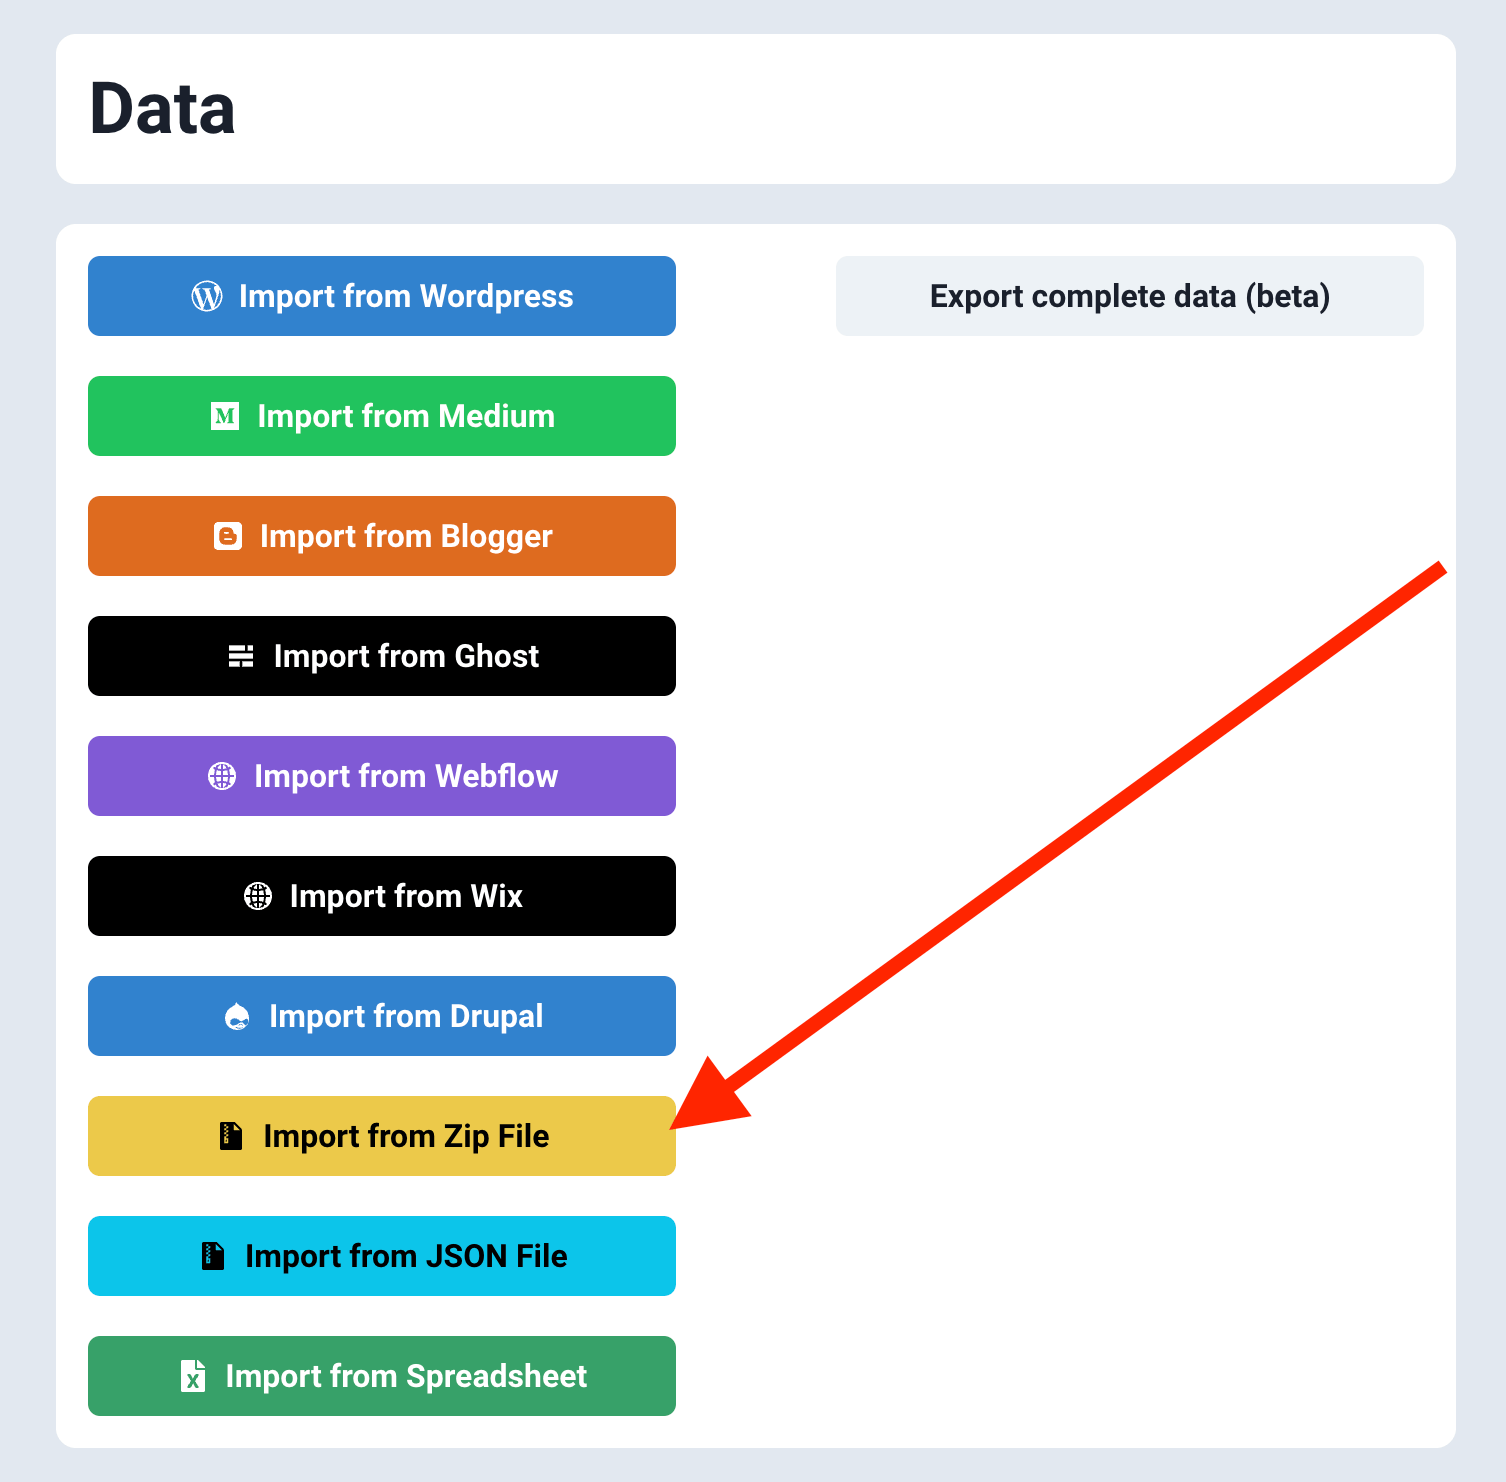
Import from Zip file
You can import upto to 300 blog posts from a zip file into Superblog in less than 2 minutes with one click.
- The zip file can contain .html or .md files.
- If there any image URLs in the posts, they will be automatically downloaded and uploaded to superblog CDN for maximum performance. (only on paid plans)
- This feature is available only in SUPER and higher plans.
Export Superblog data
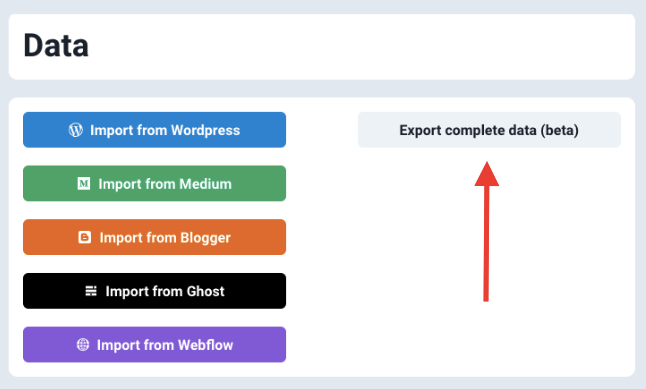
You can export your complete Superblog data like posts, tags, categories, authors in case you want to move out of Superblog at any point of time. The data is downloaded as a JSON file. You can convert the JSON file to CSV file and import it into your favorite CMS.
You can then use the JSON file to import in WordPress using JSON-importer plugin. Or you can use the JSON file programmatically in any CMS. However you need to download the images manually at this point of time.
Here is a tutorial to import superblog data into WordPress. The PRO version of this plugin will automatically download the images.
Note: Only delete your superblog after you confirm the data migration.
API Keys
You need to be on PRO or higher plan to use this feature. API keys are useful if you want to manage your Superblog via API.
- Click on the 'Generate API key' button to generate a new API key.
- Copy the code somewhere safe, because you will be able to see it ever again.
- Click on the "Revoke" button to invalidate the API key.