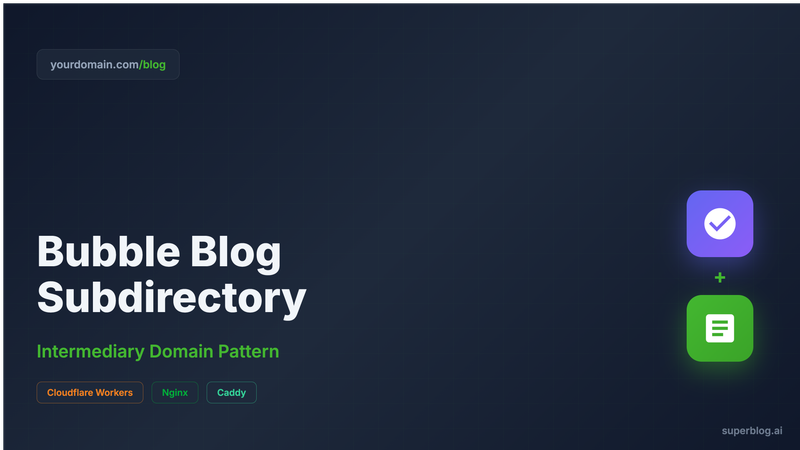
How to Add a Blog to Your Bubble App on a Subdirectory
If you are building on Bubble and want to run your blog at yourdomain.com/blog, this guide is for you.
Most articles skip straight to code snippets. That is where teams get burned. The routing logic is only one part of the problem. Domain topology, DNS behavior, caching, and indexing rules matter just as much.
This guide explains the full path in order:
The business reason to use a subdirectory
Why Bubble teams hit routing issues
The architecture that actually works
Exact implementation options with Cloudflare Workers, Nginx, and Caddy
SEO and operational safeguards so the setup stays healthy
Why Bubble teams care about /blog
You can publish on a subdomain today with low setup effort. The reason teams still push for /blog is SEO and growth efficiency.
yourdomain.com/blog usually gives cleaner execution for B2B content programs because:
Link equity and brand authority compound on one host
Internal links from blog posts strengthen product pages directly
Analytics and attribution are easier to reason about
Users experience one consistent domain journey from content to signup
If your blog is part of acquisition, not just publishing, subdirectory architecture is worth doing right.
Why this is hard on Bubble
The challenge is not your CMS. It is the network layer.
You may use Ghost, WordPress, Superblog, or any other blog stack. The same constraint appears when Bubble app traffic and custom edge routing both try to control the same root host.
At a high level:
Bubble custom domains already run through Bubble managed edge infrastructure
Teams then try to add their own root-domain proxy and path routing
The result can be DNS or proxy conflicts, especially with cross-account Cloudflare behavior
This is why many teams report that early experiments worked, then became unstable or stopped working after DNS or platform changes.
The architecture that works reliably
Use an intermediary app host and route from a single public domain.
Target architecture
Public domain:
yourdomain.comBubble app origin:
bubble.yourdomain.comBlog origin:
blog.yourdomain.comRouting rule:
/blog/*goes to blog origineverything else goes to Bubble origin
This pattern is reliable because each origin has a clear responsibility, and your public host has one deterministic router.
Step 0: pick your path before touching DNS
Before implementation, choose one of these paths.
Path A: fastest, lowest risk
Keep Bubble on root
Keep blog on
blog.yourdomain.comAccept subdomain SEO tradeoff
This is fine if you are early-stage and need speed.
Path B: subdirectory with durable routing
Move Bubble to
proxy.yourdomain.comPut edge routing on
yourdomain.comSend
/blog/*to blog origin
This is the path this guide implements.
Path C: enterprise networking setup
Keep Bubble on root
Implement advanced cross-account edge setup
This can work, but complexity and cost are usually too high for most teams.
Step 1: migrate Bubble to intermediary host
If your Bubble app is currently on yourdomain.com, do this first.
In Bubble, open
Settings -> Domain / emailAdd
proxy.yourdomain.comComplete Bubble verification
Confirm the app is healthy on
https://proxy.yourdomain.comKeep old root configuration until final cutover day
Do not rush this step. Validate auth, cookies, webhooks, and callback URLs before routing public traffic.
Step 2: prepare blog origin
Your blog should be live on an origin host before subdirectory routing.
Examples:
Ghost at
blog.yourdomain.comWordPress at
blog.yourdomain.comSuperblog connected to blog origin host
Validation checklist:
Blog homepage loads
Post URLs resolve
CSS/JS/image assets load correctly
Sitemap is available
Canonicals currently point to blog host
You will later rewrite public URLs to /blog/*.
Step 3: choose your router
Now choose one router. Use only one for production.
Cloudflare Workers: no server management
Nginx: full control, server required
Caddy: concise config, server required, automatic TLS
Option 1: Cloudflare Workers
This is the strongest default for teams that want serverless operations.
DNS model
Use the following pattern in DNS:
Important: keep proxy.yourdomain.com as DNS only to avoid double-proxy edge issues.
Worker route
Attach one Worker to:
yourdomain.com/*
Worker code
This script:
routes
/blogand/blog/*to blog originstrips
/blogbefore upstream fetchforwards all other paths to Bubble intermediary
rewrites common HTML URLs so links stay inside
/blog
const PUBLIC_HOST = 'yourdomain.com'
const BUBBLE_HOST = 'proxy.yourdomain.com'
const BLOG_HOST = 'blog.yourdomain.com'
const BLOG_PREFIX = '/blog'
class AttrRewriter {
constructor(attr) {
this.attr = attr
}
element(el) {
const v = el.getAttribute(this.attr)
if (!v) return
const blogAbs = new RegExp(`^https?://${BLOG_HOST.replace('.', '\.')}(?=/|$)`, 'i')

if (blogAbs.test(v)) {
  el.setAttribute(this.attr, v.replace(blogAbs, `https://${PUBLIC_HOST}${BLOG_PREFIX}`))
  return
}

if (v.startsWith('/')) {
  el.setAttribute(this.attr, `${BLOG_PREFIX}${v}`)
}

}
}
function mapBlog(url) {
const path = url.pathname === BLOG_PREFIX ? '/' : (url.pathname.replace(BLOG_PREFIX, '') || '/')
return https://${BLOG_HOST}${path}${url.search}
}
function mapBubble(url) {
return https://${BUBBLE_HOST}${url.pathname}${url.search}
}
export default {
async fetch(request) {
const url = new URL(request.url)
const isBlog = url.pathname === BLOG_PREFIX || url.pathname.startsWith(${BLOG_PREFIX}/)
const upstream = isBlog ? mapBlog(url) : mapBubble(url)
const upstreamReq = new Request(upstream, request)
const upstreamRes = await fetch(upstreamReq)

if (!isBlog) return upstreamRes

const ct = upstreamRes.headers.get('content-type') || ''
if (!ct.includes('text/html')) return upstreamRes

return new HTMLRewriter()
  .on('a', new AttrRewriter('href'))
  .on('link', new AttrRewriter('href'))
  .on('img', new AttrRewriter('src'))
  .on('script', new AttrRewriter('src'))
  .on('source', new AttrRewriter('srcset'))
  .transform(upstreamRes)

},
}
Smoke test
Test in this order:
yourdomain.com-> Bubbleyourdomain.com/pricing-> Bubbleyourdomain.com/blog-> blog homeyourdomain.com/blog/post-slug-> blog postone blog post with many images and scripts
Option 2: Nginx
Best when you already run infrastructure and need full control.
DNS model
A @ -> <nginx_server_ip>Bubble remains on
proxy.yourdomain.comBlog remains on
blog.yourdomain.com
Nginx config
server {
listen 80;
listen [::]:80;
server_name yourdomain.com www.yourdomain.com;
location /blog/ {
    rewrite ^/blog/?(.*)$ /$1 break;
    proxy_pass https://blog.yourdomain.com;

    proxy_set_header Host blog.yourdomain.com;
    proxy_set_header X-Forwarded-Host $host;
    proxy_set_header X-Forwarded-Proto $scheme;
    proxy_set_header X-Real-IP $remote_addr;
    proxy_set_header X-Forwarded-For $proxy_add_x_forwarded_for;

    sub_filter_once off;
    sub_filter_types text/html;
    sub_filter 'https://blog.yourdomain.com/' 'https://yourdomain.com/blog/';
    sub_filter 'href="/' 'href="/blog/';
    sub_filter 'src="/' 'src="/blog/';
}

location / {
    proxy_pass https://proxy.yourdomain.com;

    proxy_set_header Host proxy.yourdomain.com;
    proxy_set_header X-Forwarded-Host $host;
    proxy_set_header X-Forwarded-Proto $scheme;
    proxy_set_header X-Real-IP $remote_addr;
    proxy_set_header X-Forwarded-For $proxy_add_x_forwarded_for;

    proxy_http_version 1.1;
    proxy_set_header Upgrade $http_upgrade;
    proxy_set_header Connection "upgrade";
}

}
Then run:
sudo nginx -t
sudo systemctl reload nginx
Option 3: Caddy
Strong fit when you want concise server-side config and automatic TLS.
DNS model
A @ -> <caddy_server_ip>Bubble remains on
proxy.yourdomain.comBlog remains on
blog.yourdomain.com
Caddyfile
yourdomain.com {
@blog path /blog /blog/*
handle @blog {
    uri strip_prefix /blog
    reverse_proxy https://blog.yourdomain.com {
        header_up Host blog.yourdomain.com
    }
}

handle {
    reverse_proxy https://proxy.yourdomain.com {
        header_up Host proxy.yourdomain.com
    }
}

}
Then run:
caddy validate --config /etc/caddy/Caddyfile
caddy reload --config /etc/caddy/Caddyfile
SEO hardening after cutover
Once traffic flows correctly, fix indexing immediately.
Canonical URLs should point to
yourdomain.com/blog/Prevent indexing on
blog.yourdomain.com/or 301 it to/blog/Submit only subdirectory sitemap URLs to Search Console
Ensure all internal links use
/blog/Verify OG, canonical, and robots on multiple posts
If you skip this step, you risk duplicate content and split indexing signals.
Operational pitfalls to watch
/blogworks but assets fail: prefix stripping or HTML rewriting issueauth/session glitches: host header or cookie domain mismatch
mixed content: origin still serving
http://resourcesstale pages: cache purge policy is missing
duplicate indexing: subdomain still crawlable
Why teams think the setup is random
It feels random because multiple layers interact:
Bubble edge behavior
your DNS provider behavior
your proxy cache behavior
your CMS URL generation behavior
If one layer is misconfigured, symptoms appear in another layer. That is why a full architecture-first plan beats isolated code snippets.
Practical recommendation
If you need control and can maintain infra, the intermediary-domain pattern with Workers, Nginx, or Caddy is a valid long-term setup.
If you do not want to own routing complexity, use a managed blog platform designed for subdirectory hosting.
For Bubble teams, Superblog is usually the fastest path to get /blog live with production-grade SEO and zero proxy maintenance. You get:
Native subdirectory hosting on your domain
Automatic JSON-LD schemas, sitemap generation, and IndexNow submission
Built-in
llms.txtgeneration for AI crawler discovery90+ Lighthouse performance pages out of the box
CMS, frontend, hosting, CDN, and SSL in one stack
This is the core tradeoff. You can own the routing layer, or you can ship content and rankings while Superblog handles the infrastructure.
How easy it is with Superblog
With Superblog, you do not need to build custom routing logic in your CMS.
You only do this:
Create your Superblog
Connect
yourdomain.com/blogto your superblog.Pick your preferred router and follow the instructions for:
Cloudflare Workers
Nginx
Caddy
After that, you are done. There is no extra proxy setup to do inside Superblog.
Your team can move straight to writing and publishing.
References
Cloudflare Error 1014 (CNAME Cross-User Banned):
developers.cloudflare.com/support/troubleshooting/http-status-codes/cloudflare-1xxx-errors/error-1014/Cloudflare for SaaS docs:
developers.cloudflare.com/cloudflare-for-platforms/cloudflare-for-saas/start/getting-started/Bubble community thread on
/blogrouting attempts:forum.bubble.io/t/blog-seo-ghost-wordpress-or-any-cms-on-subfolder-blog-with-bubble/121411