Getting started with Superblog
Welcome to Superblog Federation. You are a pioneer in blazing towards a new web. Let's get started!

These are the steps required to quickly set up your own superblog.
- Create your first superblog.
- Connect your own domain to superblog.
- Choose your own color scheme.
- Upload your own logo.
- Setup Google Analytics.
- Write your first post.
- Deploy.
Protip: You should prefer to upload your images to superblog when writing a post instead of inserting an image via URL. Superblog's servers/CDN are blazing fast, that's why!
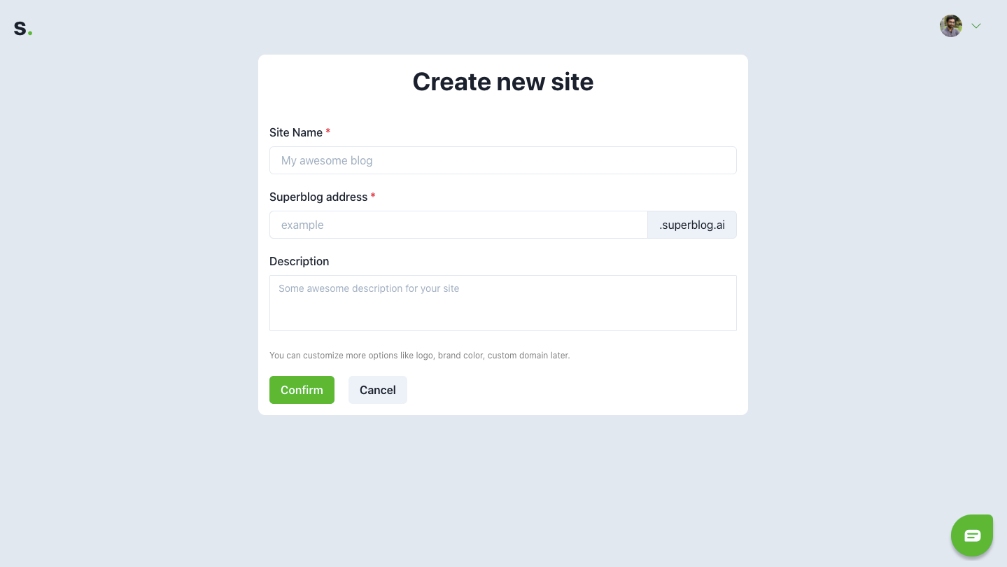
1. Create your first Superblog

- Enter a site name. This will be public and visible in the header if no logo is uploaded. Ex: Robin's Blog
- Choose a unique name for your blog's address. This will be your public address if you don't have a custom domain. Ex: robin.superblog.ai
- Give a description to your site so that people can read it and visit your main website. This will be displayed below every blog post.
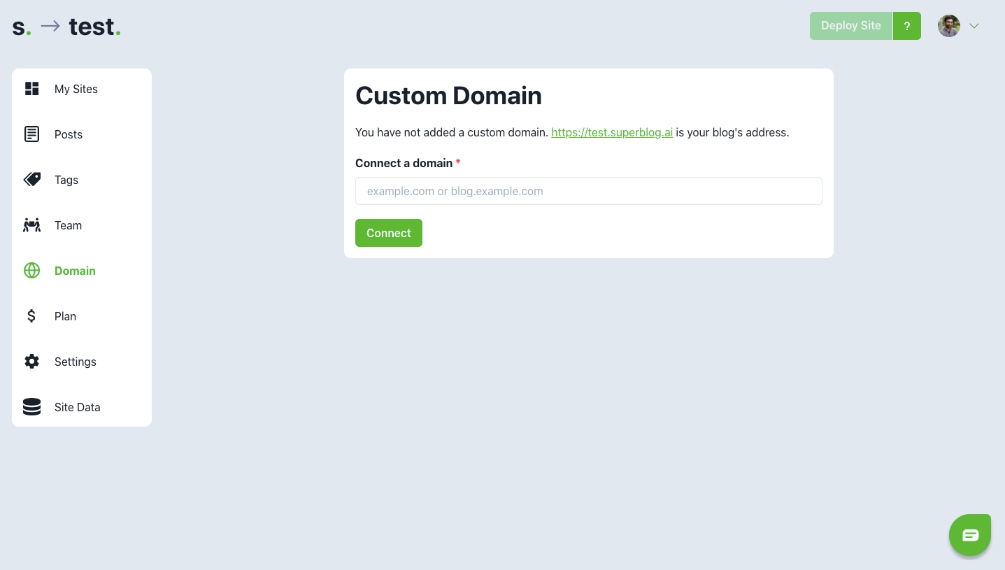
2. Connect your own domain

- You can connect your own domain to superblog. Ex: blog.robin.com
- Once your domain is connected on superblog, you need to update CNAME with your domain hosting provider.
- Messing with DNS settings can be intimidating, no worries, detailed instructions are shown on the same screen.
Watch video tutorial
3. Choose your own color scheme

- Superblog's default theme is green color. You can read why.
- You can customize the theme color to match your brand's color.
4. Upload your own logo
- You can see that 'Superblog' text on the top left of this blog.
- Once you upload a logo image, it'll replace the site name on the top left. You must make sure that your logo is in the ratio of 300:100 (width: height).
5. Setup Google Analytics
- Every blog needs analytics to see how readers are interacting with the content.
- You can embed your own google analytics tracking code. All your data is yours.
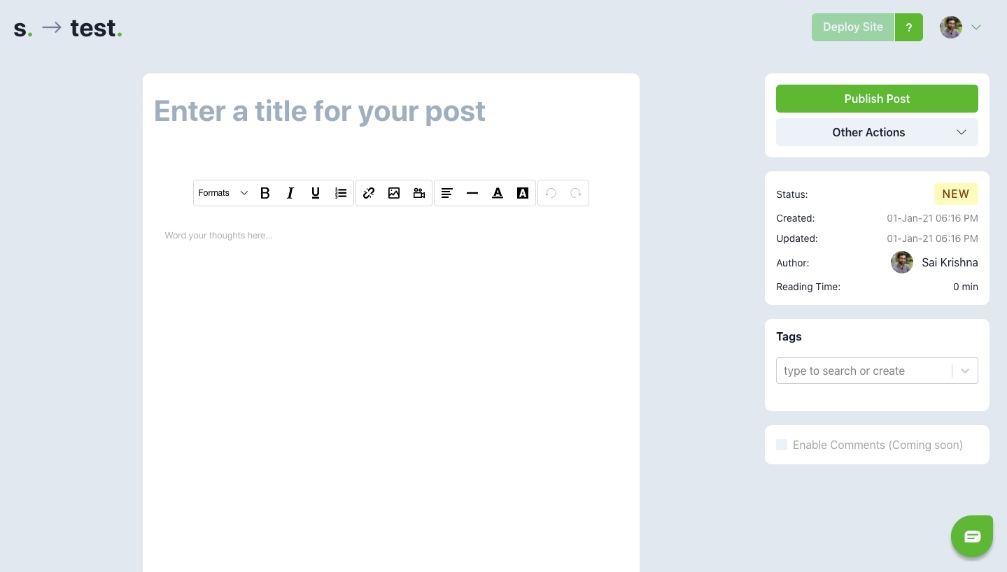
6. Write your first post

7. Deploy

After you make a number of changes like creating a new post or editing an existing one or create a new tag or update any settings, you must hit deploy button. Superblog rebuilds your entire site and deploys it in multiple servers around the world.
Go ahead and start writing something worth reading! https://write.superblog.ai
