Manage your posts
Dashboard > Posts
The Posts page lists every post on your blog, newest first.
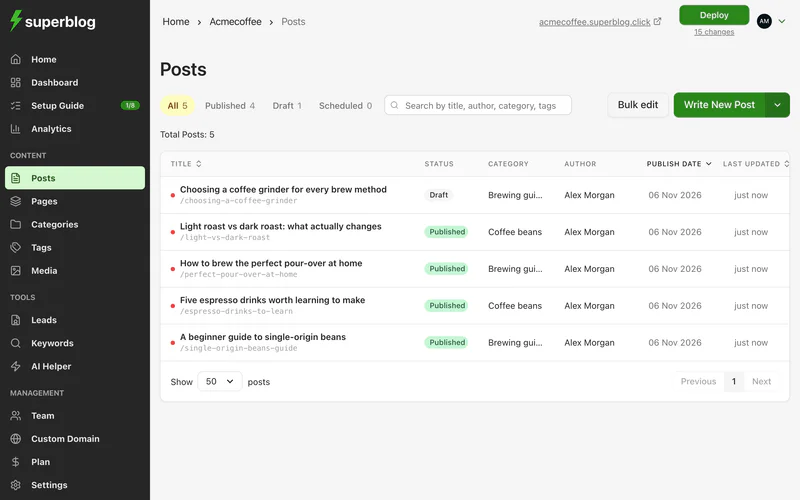
Write a new post
- Click Write New Post.
- Give the post a title, and write it in the editor.
The post starts as a draft. It is saved as you write.
Find a post
- Filter by status: All, Draft, Published or Scheduled.
- Search by title, author, category or tag.
The list shows each post's status, author, category, publish date and when it was last updated.
Publish a post
- Open the post.
- Click Publish post.
- Deploy your blog.
Publishing marks the post as ready. Readers see it after your next deploy.
Schedule a post
- Open the post.
- Click Schedule Post.
- Pick the date and time under Publish at, and click Schedule post.
At that time, the post is published and your blog is deployed for you. To cancel, open the post and click Remove schedule.
Unpublish a post
- Open the post.
- Click Unpublish post.
- Deploy your blog.
The post goes back to your drafts, and you can publish it again later.
Delete a post
- Open the post.
- In its settings, delete it.
- Deploy your blog.
Deleting cannot be undone. To take a post offline but keep it, unpublish it instead.
Change many posts at once
To publish, unpublish, recategorise, retag, reassign or delete several posts together, see Bulk edit.
Bring posts in from elsewhere
Click Import posts to create posts from a file (.docx, .md or .html), a spreadsheet, a JSON file or a zip file, or to import a whole blog from another platform. See Import and export.